Creating a Linux Deployment Server
It is extremely useful to be able to have a workflow set up to be able to install a Linux distro exactly how you need it at the drop of a dime. There are generally two ways to do this:
- Have a deployment server set up to automate the installation of a new system
- Create a golden image that is either (a) to physical media, such as a hard drive, or (b) stored as a virtual machine to be cloned or imported by your hypervisor
In this post, we're going to cover the first option.
There are a few ways to do this. One is using an out-of-the-box solution like Red Hat Satellite. There are some advantages to doing this. The first advantage is that solutions like these market themselves as turnkey solutions, meaning they have everything you need ready to go.
However, if your goal is to learn, you will definitely be robbing yourself of a lot if you choose to go this route. Additionally, you will be locked into using the software the way it was built. If there's something you want to do using a turnkey solution, but can't, then too bad you're kinda stuck. That being said, if you build a solution on your own you'll be able to tweak the system as your needs change.
Design Overview
When designing any system, the first step is determining your requirements. For this project, the design constraints are thus:
- To be able to pick from multiple distributions of Linux.
- To be able to pick from multiple releases of any given Linux distribution.
- To be able to deploy any of the above using either (a) a fully automated install or (b) a manual walk-through of the installation.
- When using an automated install, be able to pick from any number of pre-configured installation sets, e.g. pick from either a "base" install or one pre-configured as an IDM server, etc.
- To be able to deploy any of the above to either a bare-metal server or a virtual machine.
For the sake of simplicity and ease of use, I'm going to show you how to set all of this up with TrueNAS. TrueNAS Scale is a NAS-oriented variant of Debian that implements all the components we're going to need to do this and gives you an optional GUI to use to manage each component. We're going to be writing all the configuration files from scratch so there will be no sacrifice of functionality or future expansion.
It's worth noting that you can totally use the architecture outlined in this article without using TrueNAS at all, you'll just need to deploy each of the components by hand. With that in mind, let's see how we're going to architect this solution.
Components of the Deployment Server
I'm going to quickly outline the components we're going to need to make this deployment server possible. After that, we're going to walk through the boot process and explain how each component is used in the installation process.
- TFTP server – TFTP (Trivial File Transfer Protocol) is a simple file transfer protocol that we're going to use to make PXE booting possible. PXE (pre-boot execution) booting is basically a way to bootstrap the boot process using parameters fed over the network at boot. When the machine boots up it will, if configured to, attempt a PXE boot. If it does, and things are configured correctly it will load up the files it needs to boot up into memory and run basically a small hard drive in memory and run on that. You can do a lot of things with PXE booting but in this scenario, we'll be using it to load up the installation disk only.
- DHCP server - This is, unlike the rest of these protocols, not a file transfer protocol. Instead, this is something you should already have configured on your network that allows you to connect newly booted machines to your network. It is probably installed and runs on your router, but you may have one configured yourself. Either way, we're not going to be setting up a DHCP server in this tutorial, just modifying the configuration of your existing one for the sake of simplicity.
- FTP server – FTP (File Transfer Protocol) is a protocol that's been around for a long time and is a nice choice for the miscellaneous files we're going to need to use during the automated part of the installation. This is where we'll host our kickstart files (I'll go back to this in a bit) as well as any other files we may need, e.g. configuration files, SSH keys we want to install on the servers, anything really.
- NFS server – NFS (Network File Server) is the protocol we're going to use to host all the OS packages we need to install during the boot process. This is more or less a clone of the contents of the installation DVD, however, we can tailor it to our liking by adding some custom OS packages.
Alright! Those are the components we need. I know that sounds like a lot but to be honest, TrueNAS is the perfect tool for this job if you're looking to get this going in a single afternoon. I'm kind of a hardcore do-it-yourselfer and I assure you that you really can sacrifice nothing by using TrueNAS.
Now let's get into the way all these components fit in. There are two main installation scenarios we need to think about. I'll go over them briefly.
Automated Install Overview
Below are the steps the installation process will go through during an automated install, highlighting the way each component described in the last section fits into the picture:
- Your machine initializes a PXE boot, which prompts it to receive its network parameters via DHCP. Upon doing so, the machine will be fed two things: (1) the IP address of the TFTP server hosting the PXE boot files and the (2) the path on the TFTP server of the file to boot from. If (a) your machine is configured to boot in PXE mode (b) your DHCP server is configured correctly this should lead you to step 2. If not, check your settings as described below.
- Upon receiving the IP address of the TFTP server and the path of the boot file, the machine will then be presented with some options outlined in our PXE configuration file, hosted at
/pxelinux.cfg/defaulton our TFTP server. At this point, the available deployment options described in/pxelinux.cfg/defaultwill be read across your screen for you to select. Below is a basic example:
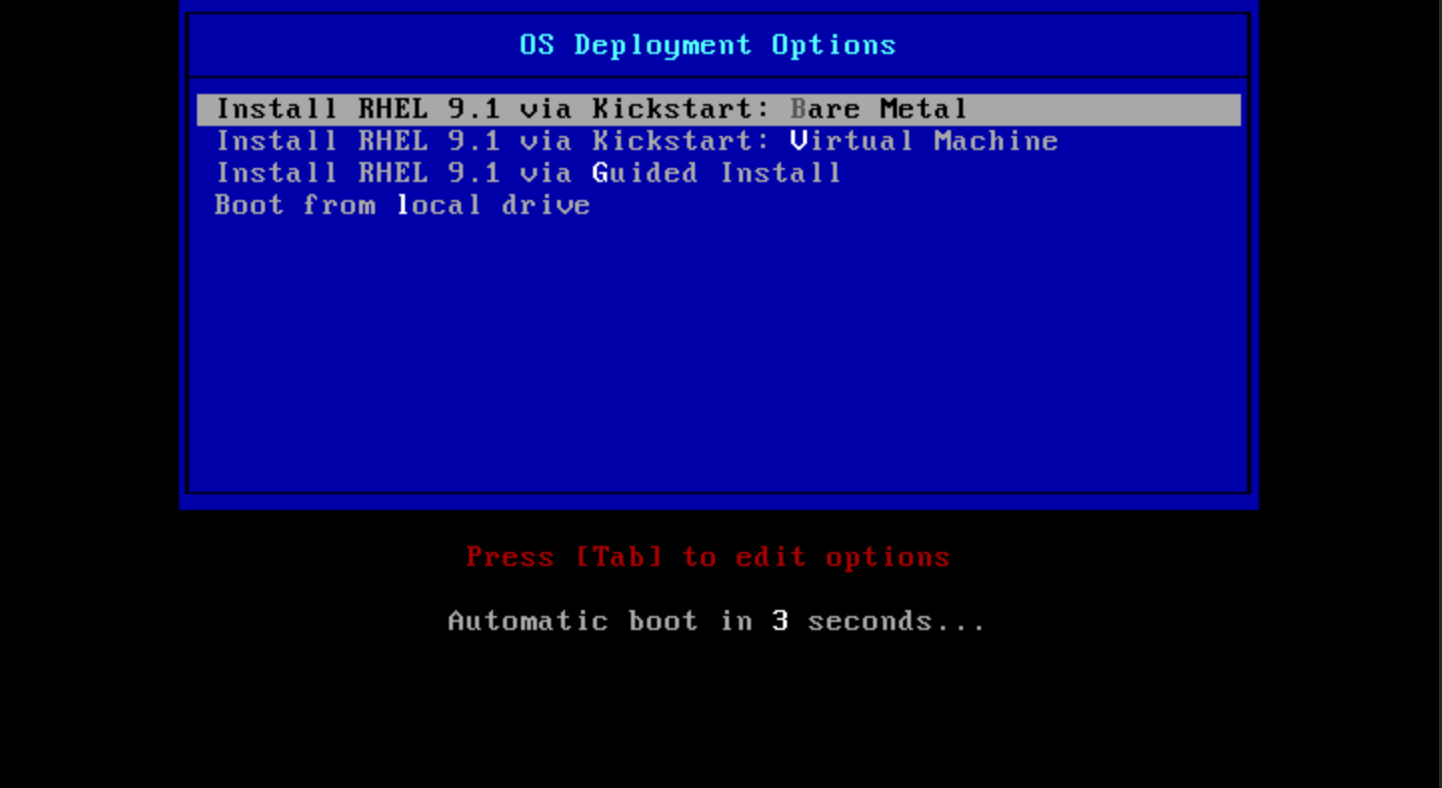
3. You will then manually select which option you want and hit enter. Depending on which option you select the correct kickstart file will be chosen and pulled down from our FTP server. This is made possible by a line like append ... inst.ks=ftp://10.0.0.2/ks/el9/ks.cfg in our /pxelinux.cfg/default. Note that we can configure this to automatically select an option for us so we don't have to have any user interaction. However, keep in mind the implications of this. It's nice to have this little bit of human interaction that way you don't end up wiping a machine that gets connected to your network just but simply plugging in the ethernet jack and turning it on!
4. The kickstart file, e.g. kickstart.cfg, will have a line in it that points the installer to the location of the NFS server hosting all the OS repositories with all of the packages we need for the installation as defined in the kickstart file. This is made possible by a line like nfs --server=10.2.0.6 --dir=/mnt/store/deployment/mirror/el9/rhel-9.1 in our kickstart.cfg file.
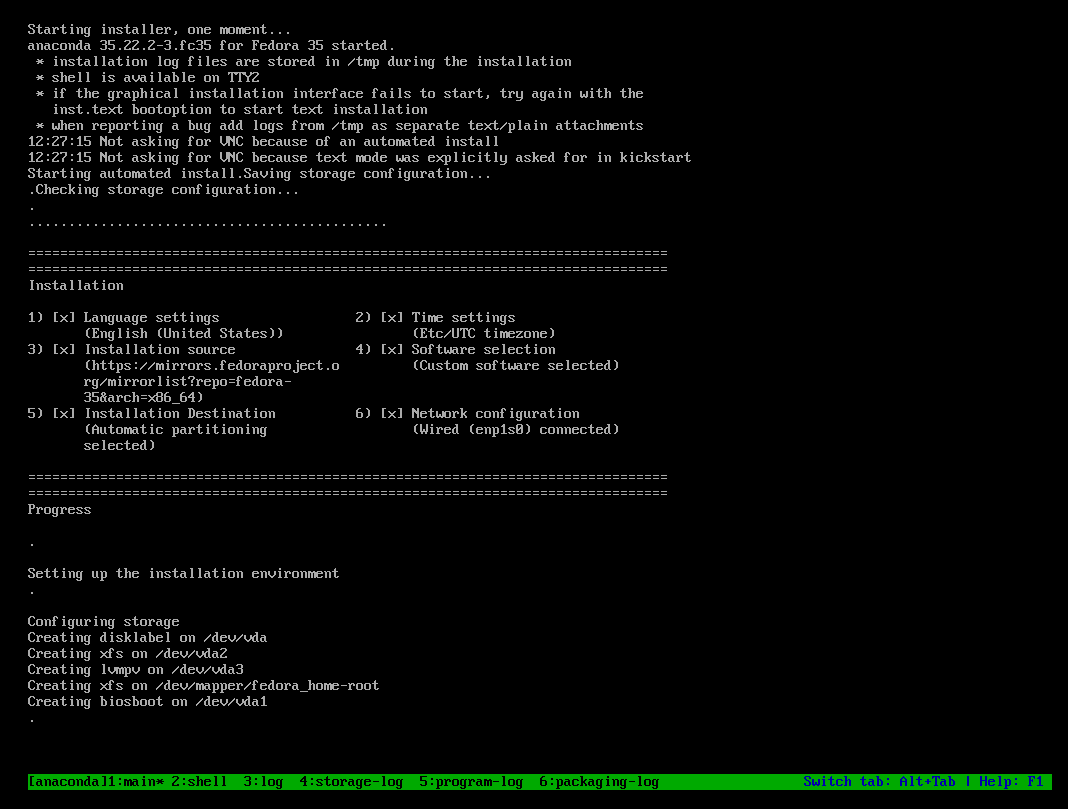
Once that is complete you should have a fully automated install going on as pictured below and you can check back in in a few minutes for your fresh OS ready to go!
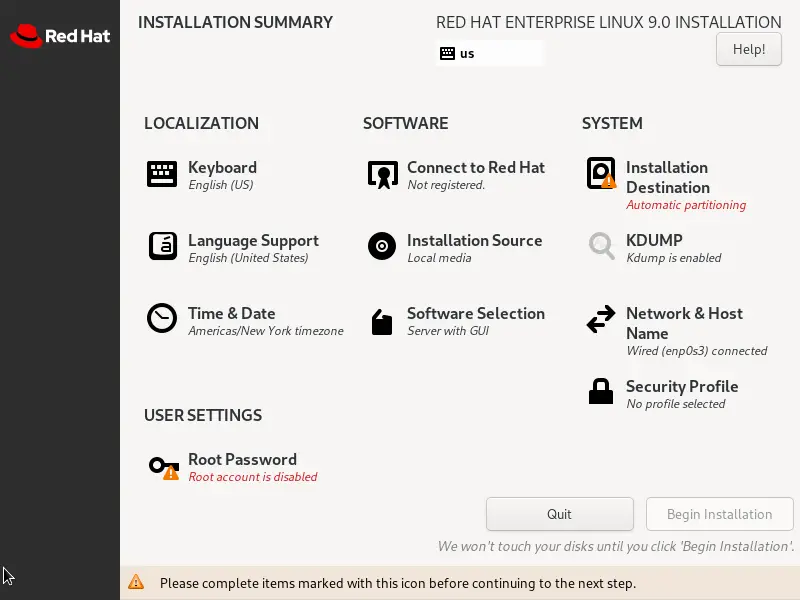
The non-automated version of this is the exact same except that in step 3, you will select an option which will, instead of initiating an automated install and showing the image above, present you with the familiar screen shown below allowing you to click through the installer as you normally would.
Configuring the Server
There are basically 3 steps to getting this up and running
- Get your services up and running
- Get your configuration files in place
- Get your files that need to be hosted in-place
Alright, here we go!
Configuring the Services
I'm going to assume you already have a fresh install of TrueNAS configured as there are plenty of articles on how to do this. To be honest it's pretty simple just flash the ISO to a flash drive and install it disk you can boot from. There are no options during the installation it's pretty to the point.
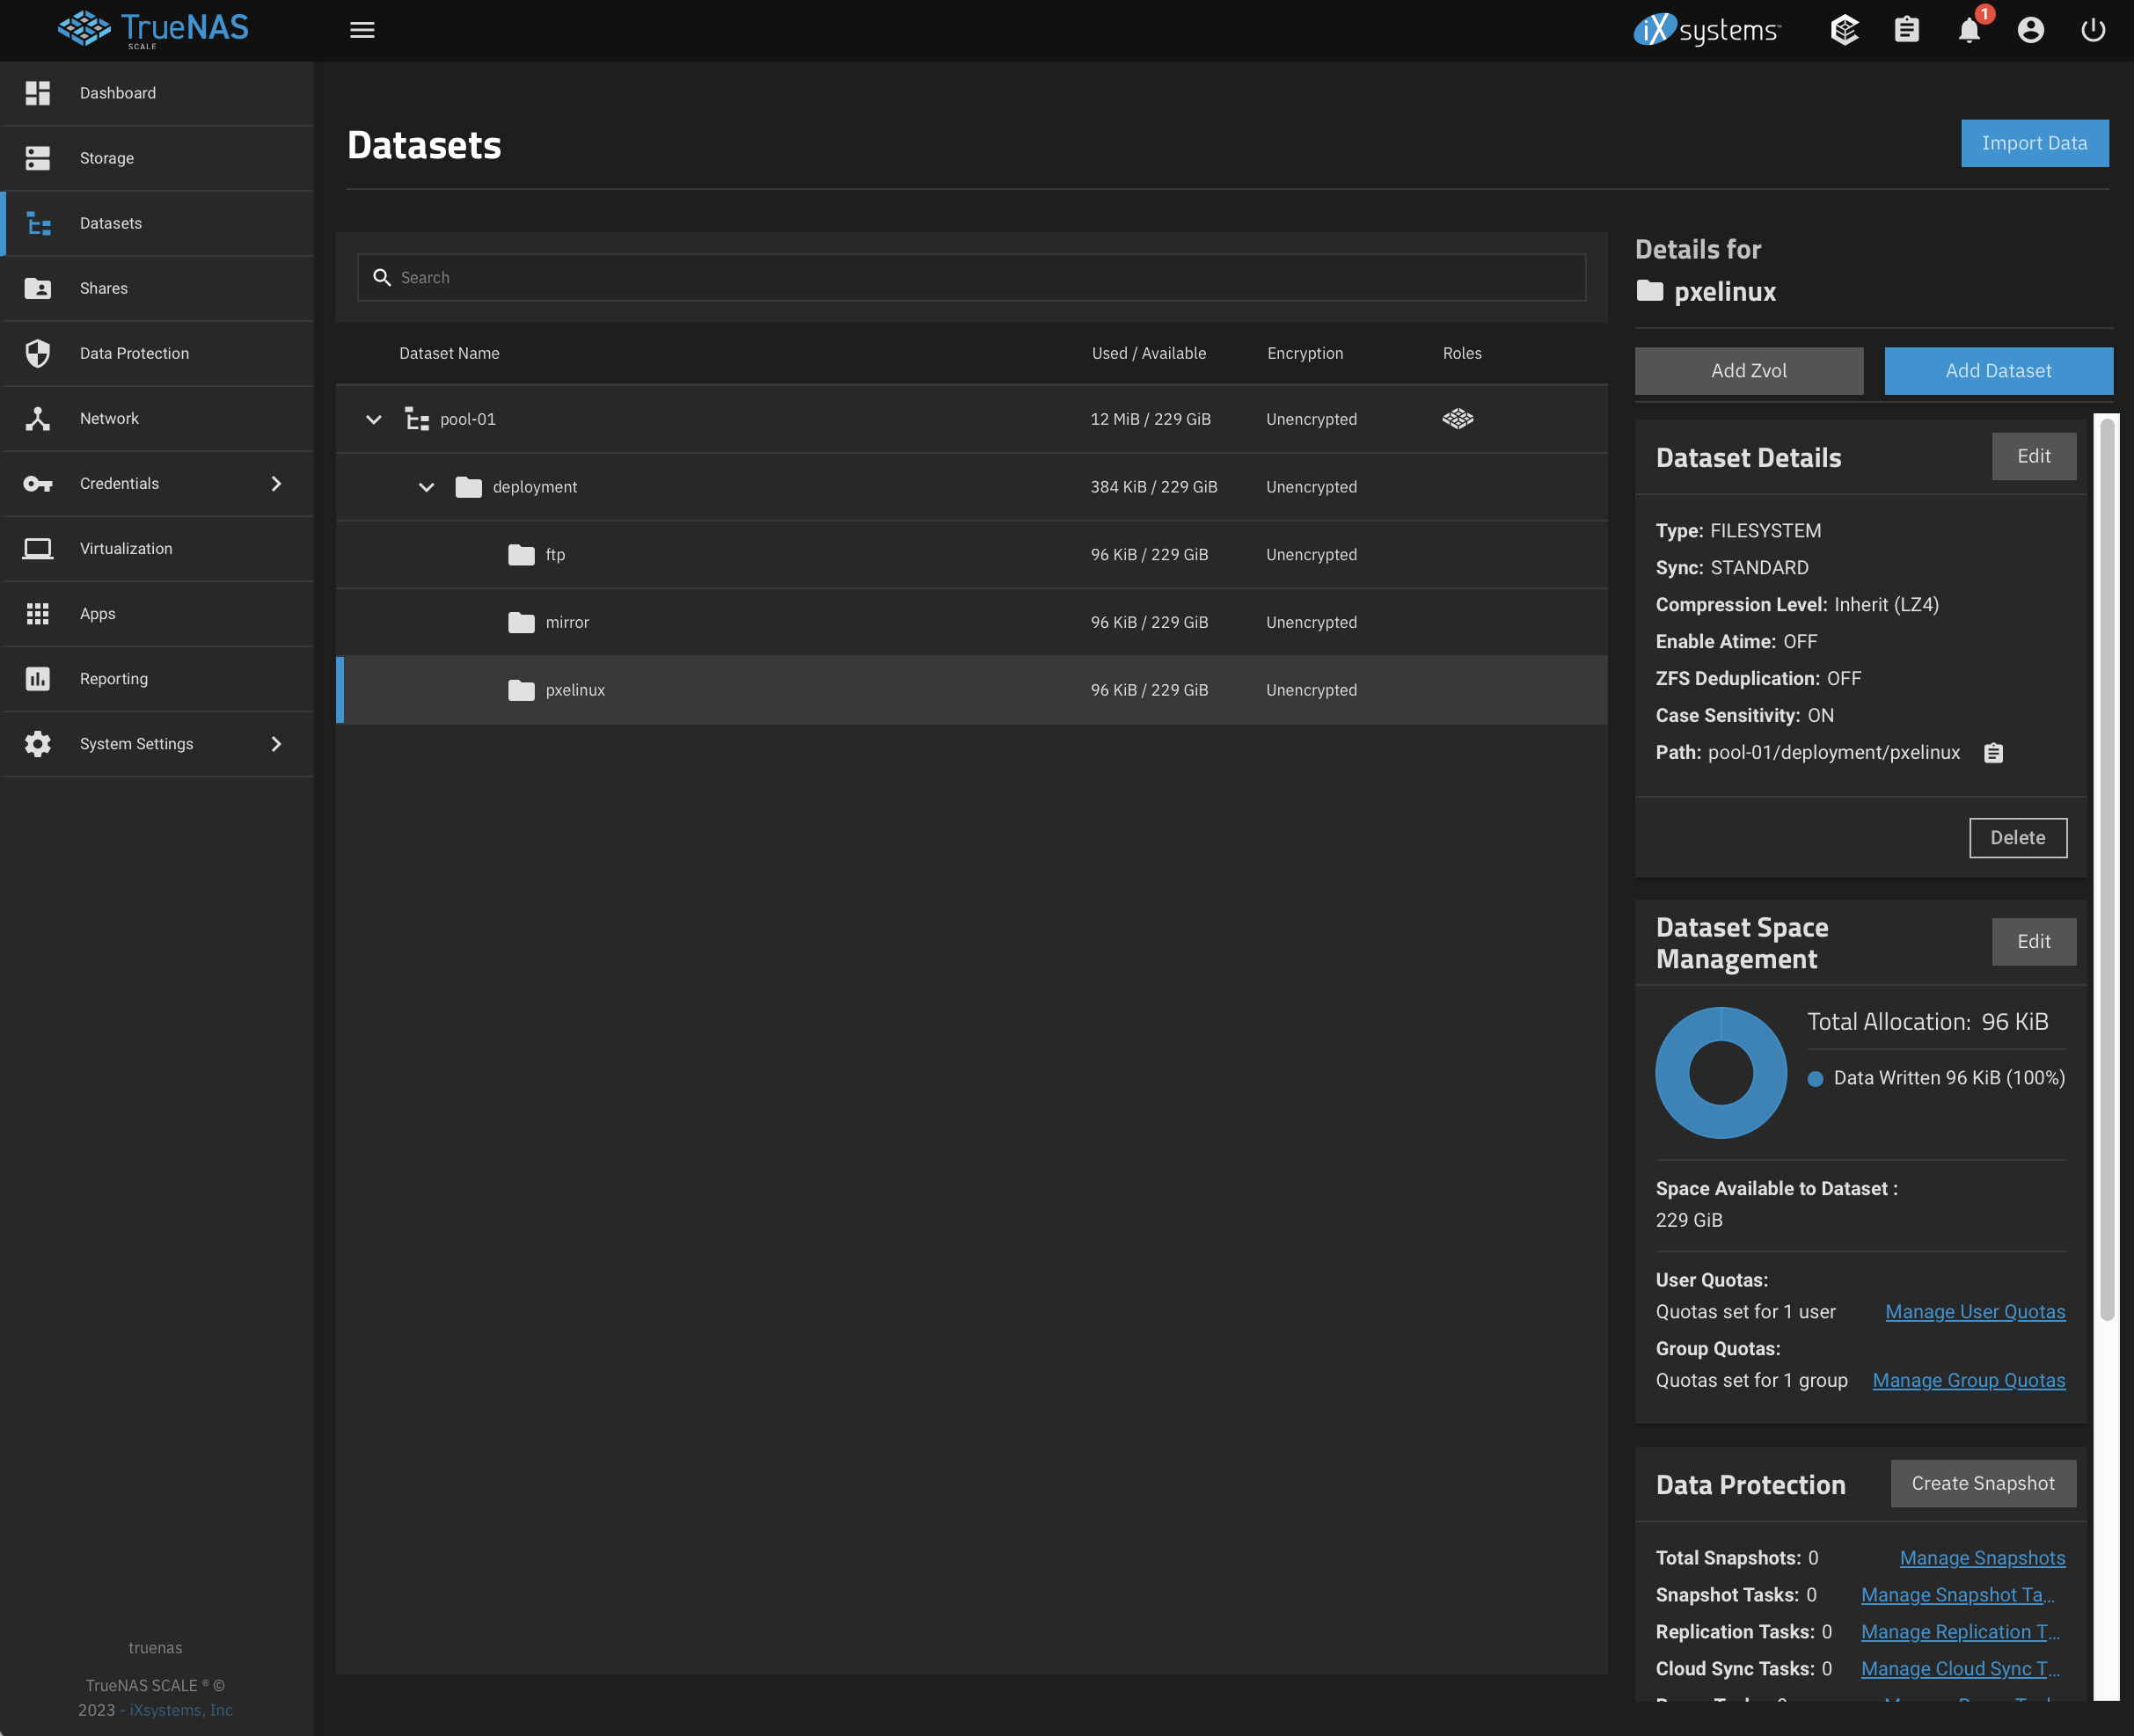
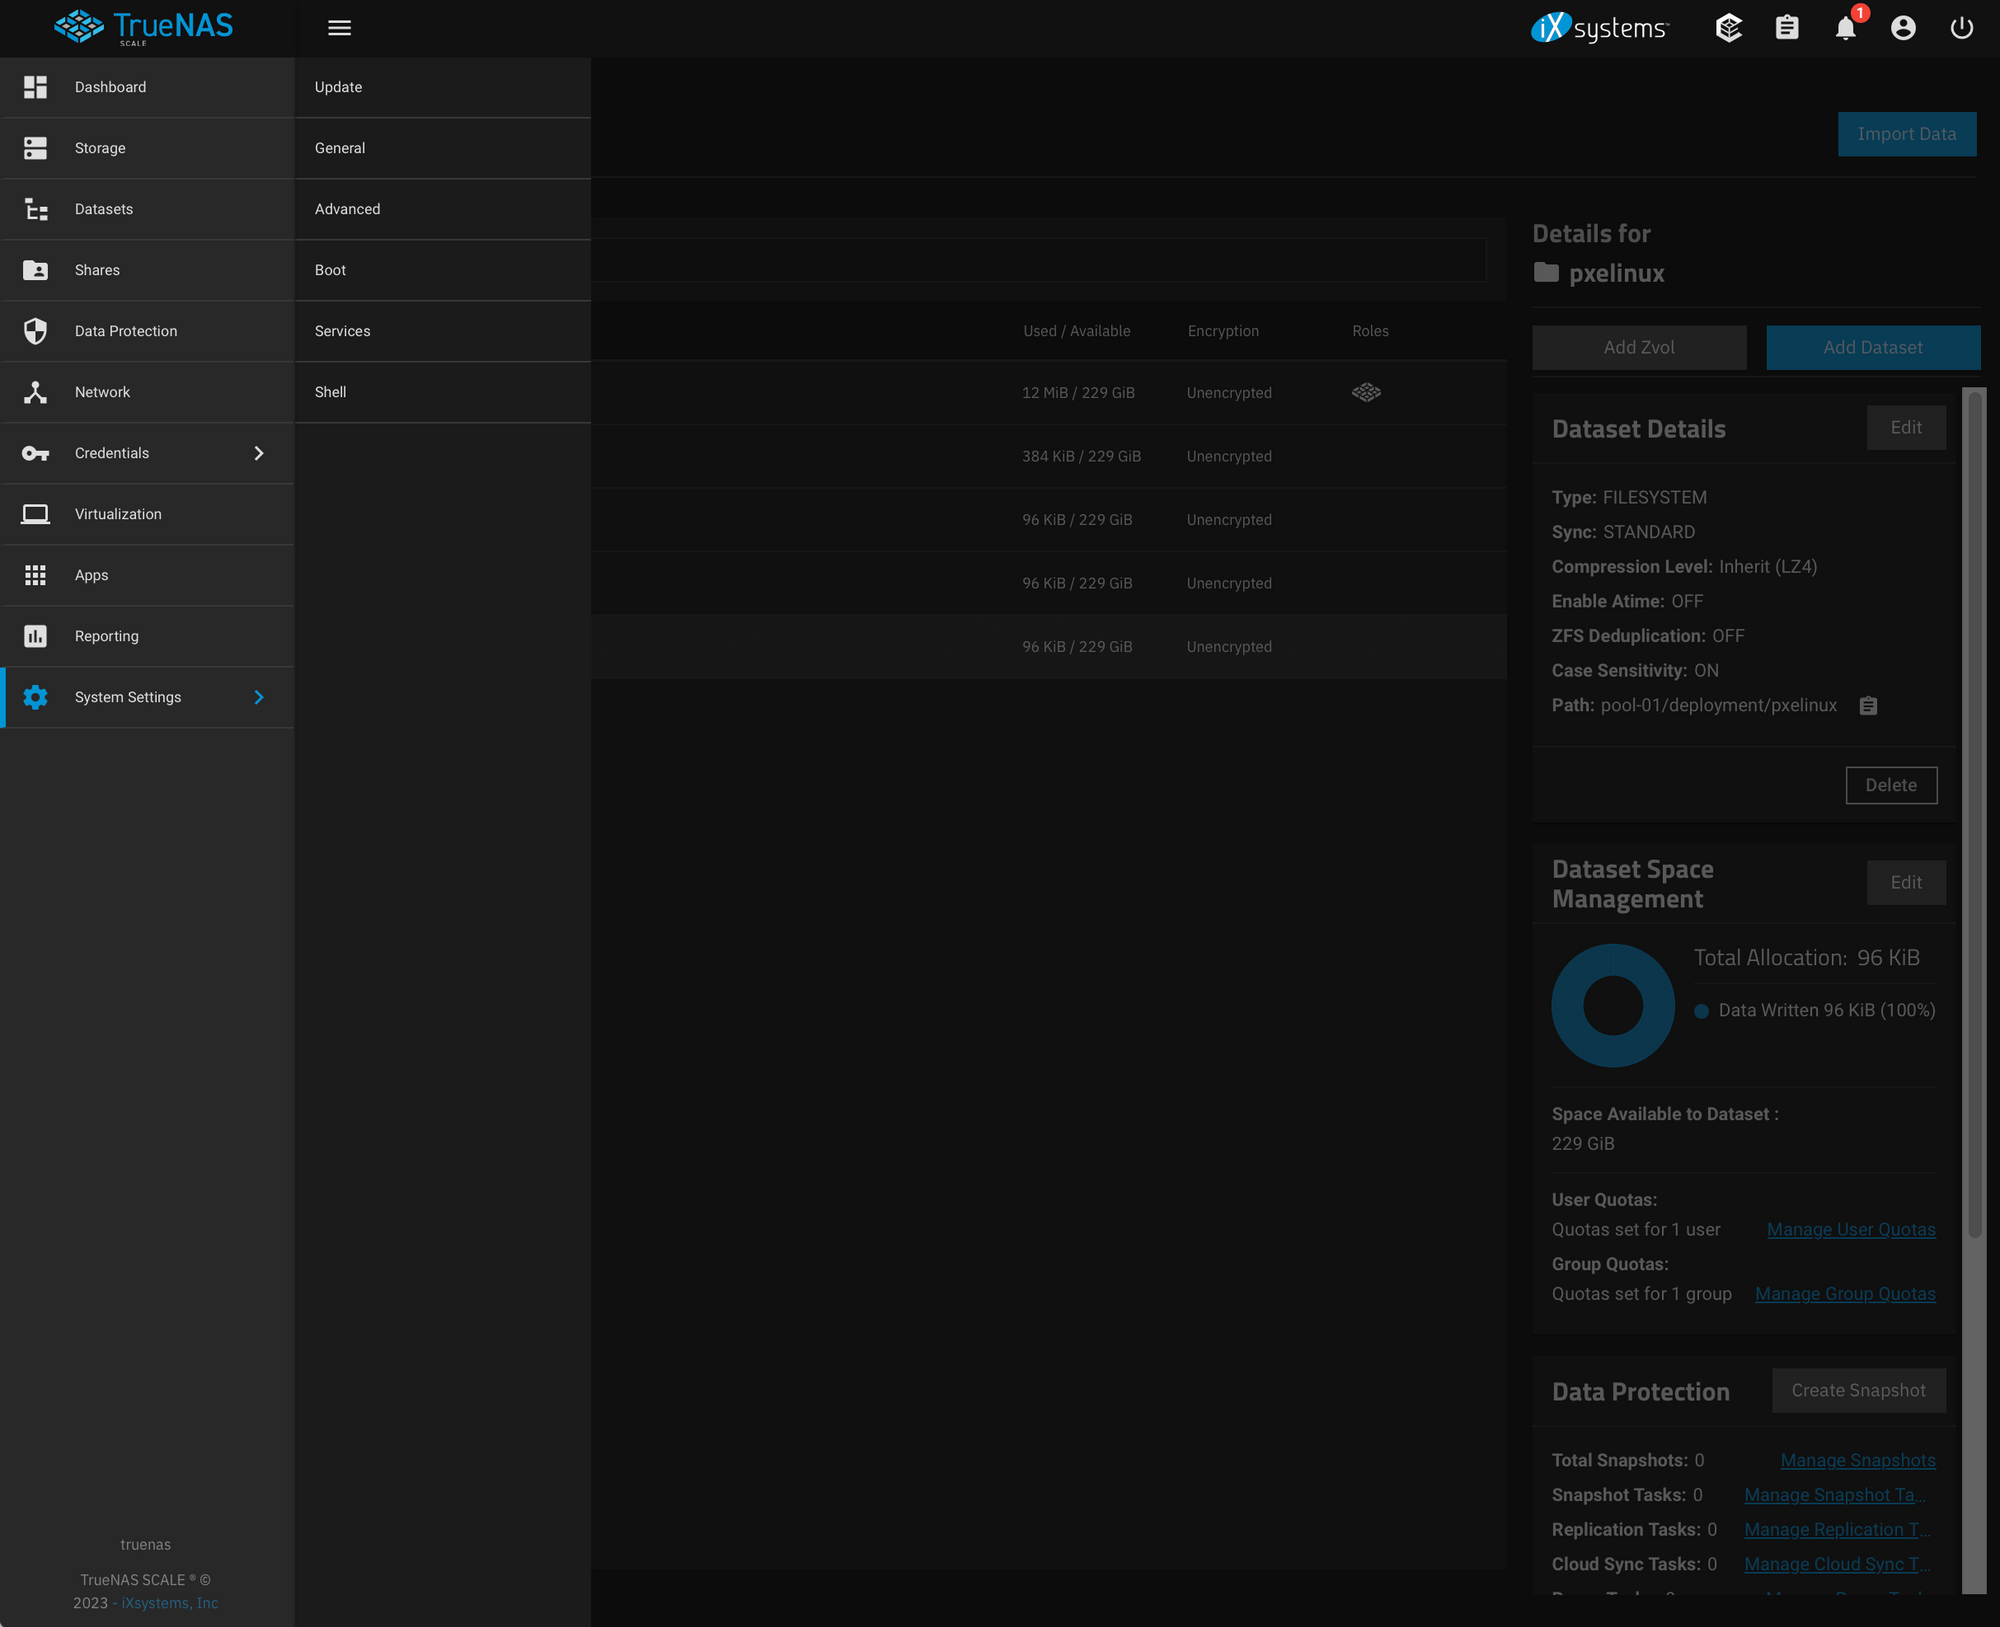
Once you've got a TrueNAS installation and storage pool configured you should see something like this when you go to Datasets:
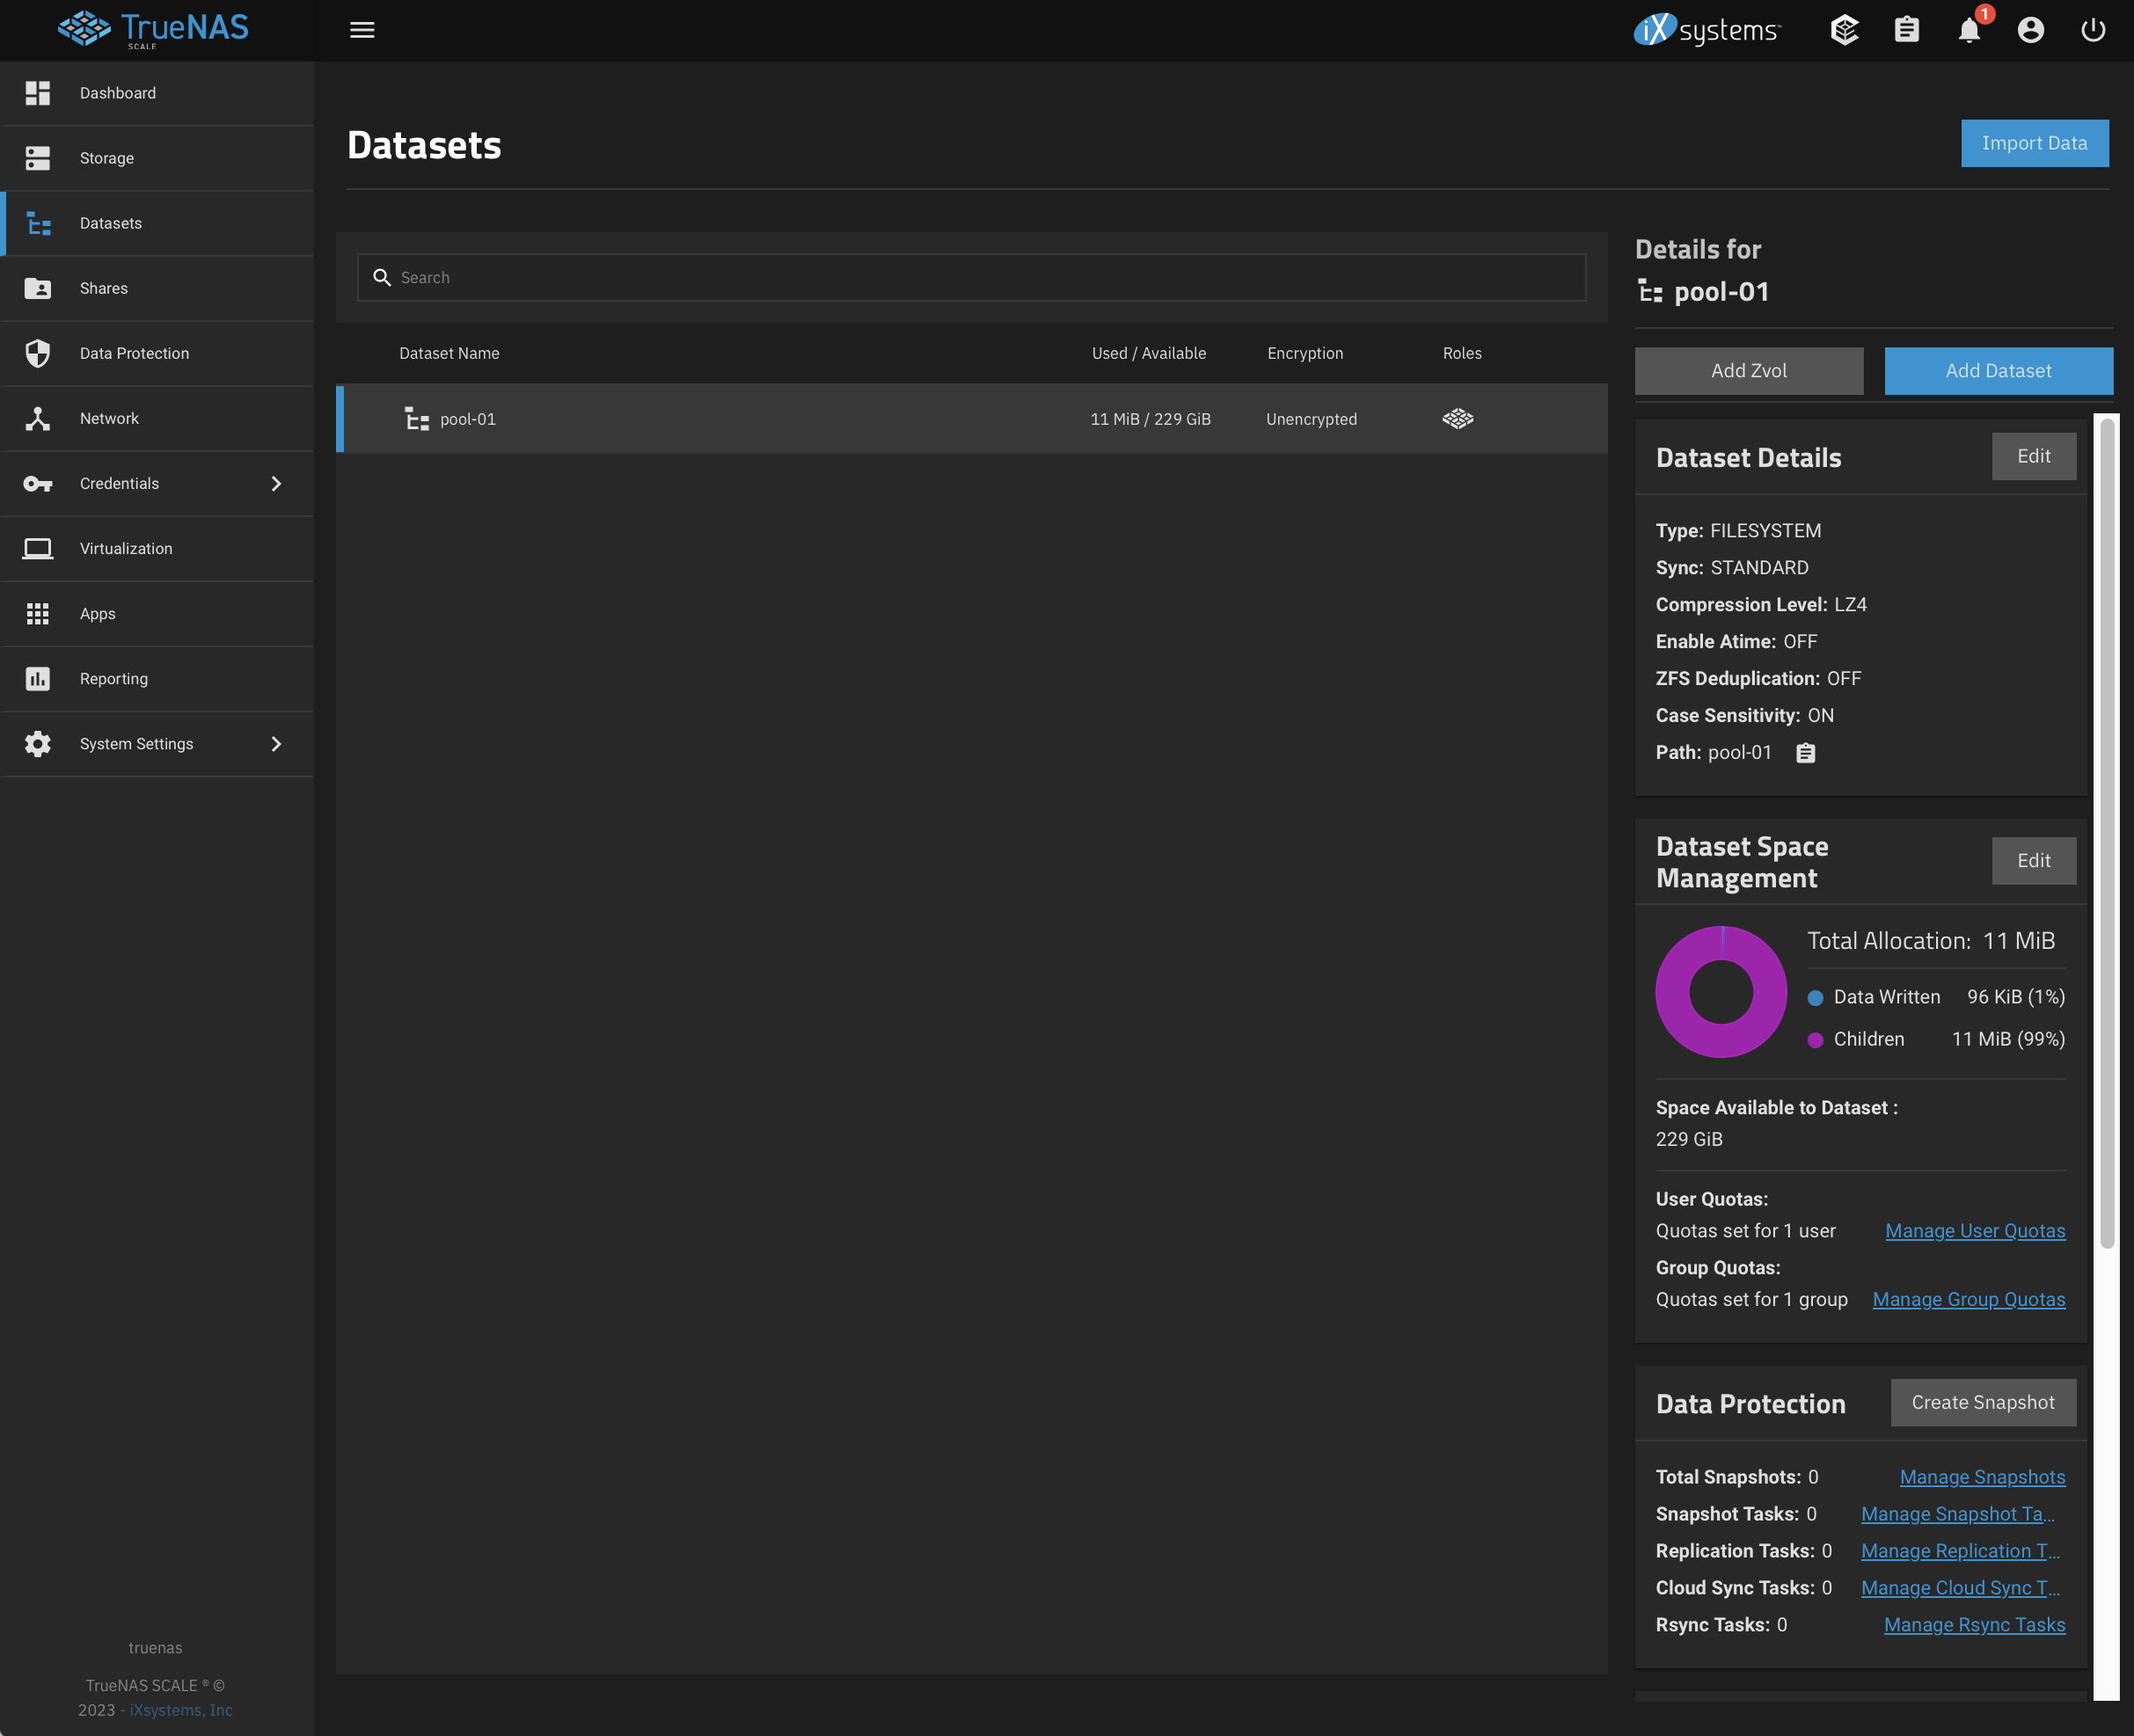
Go ahead and create a new Dataset within your storage pool by selecting "Add Dataset" off to the right and name it "Deployment".
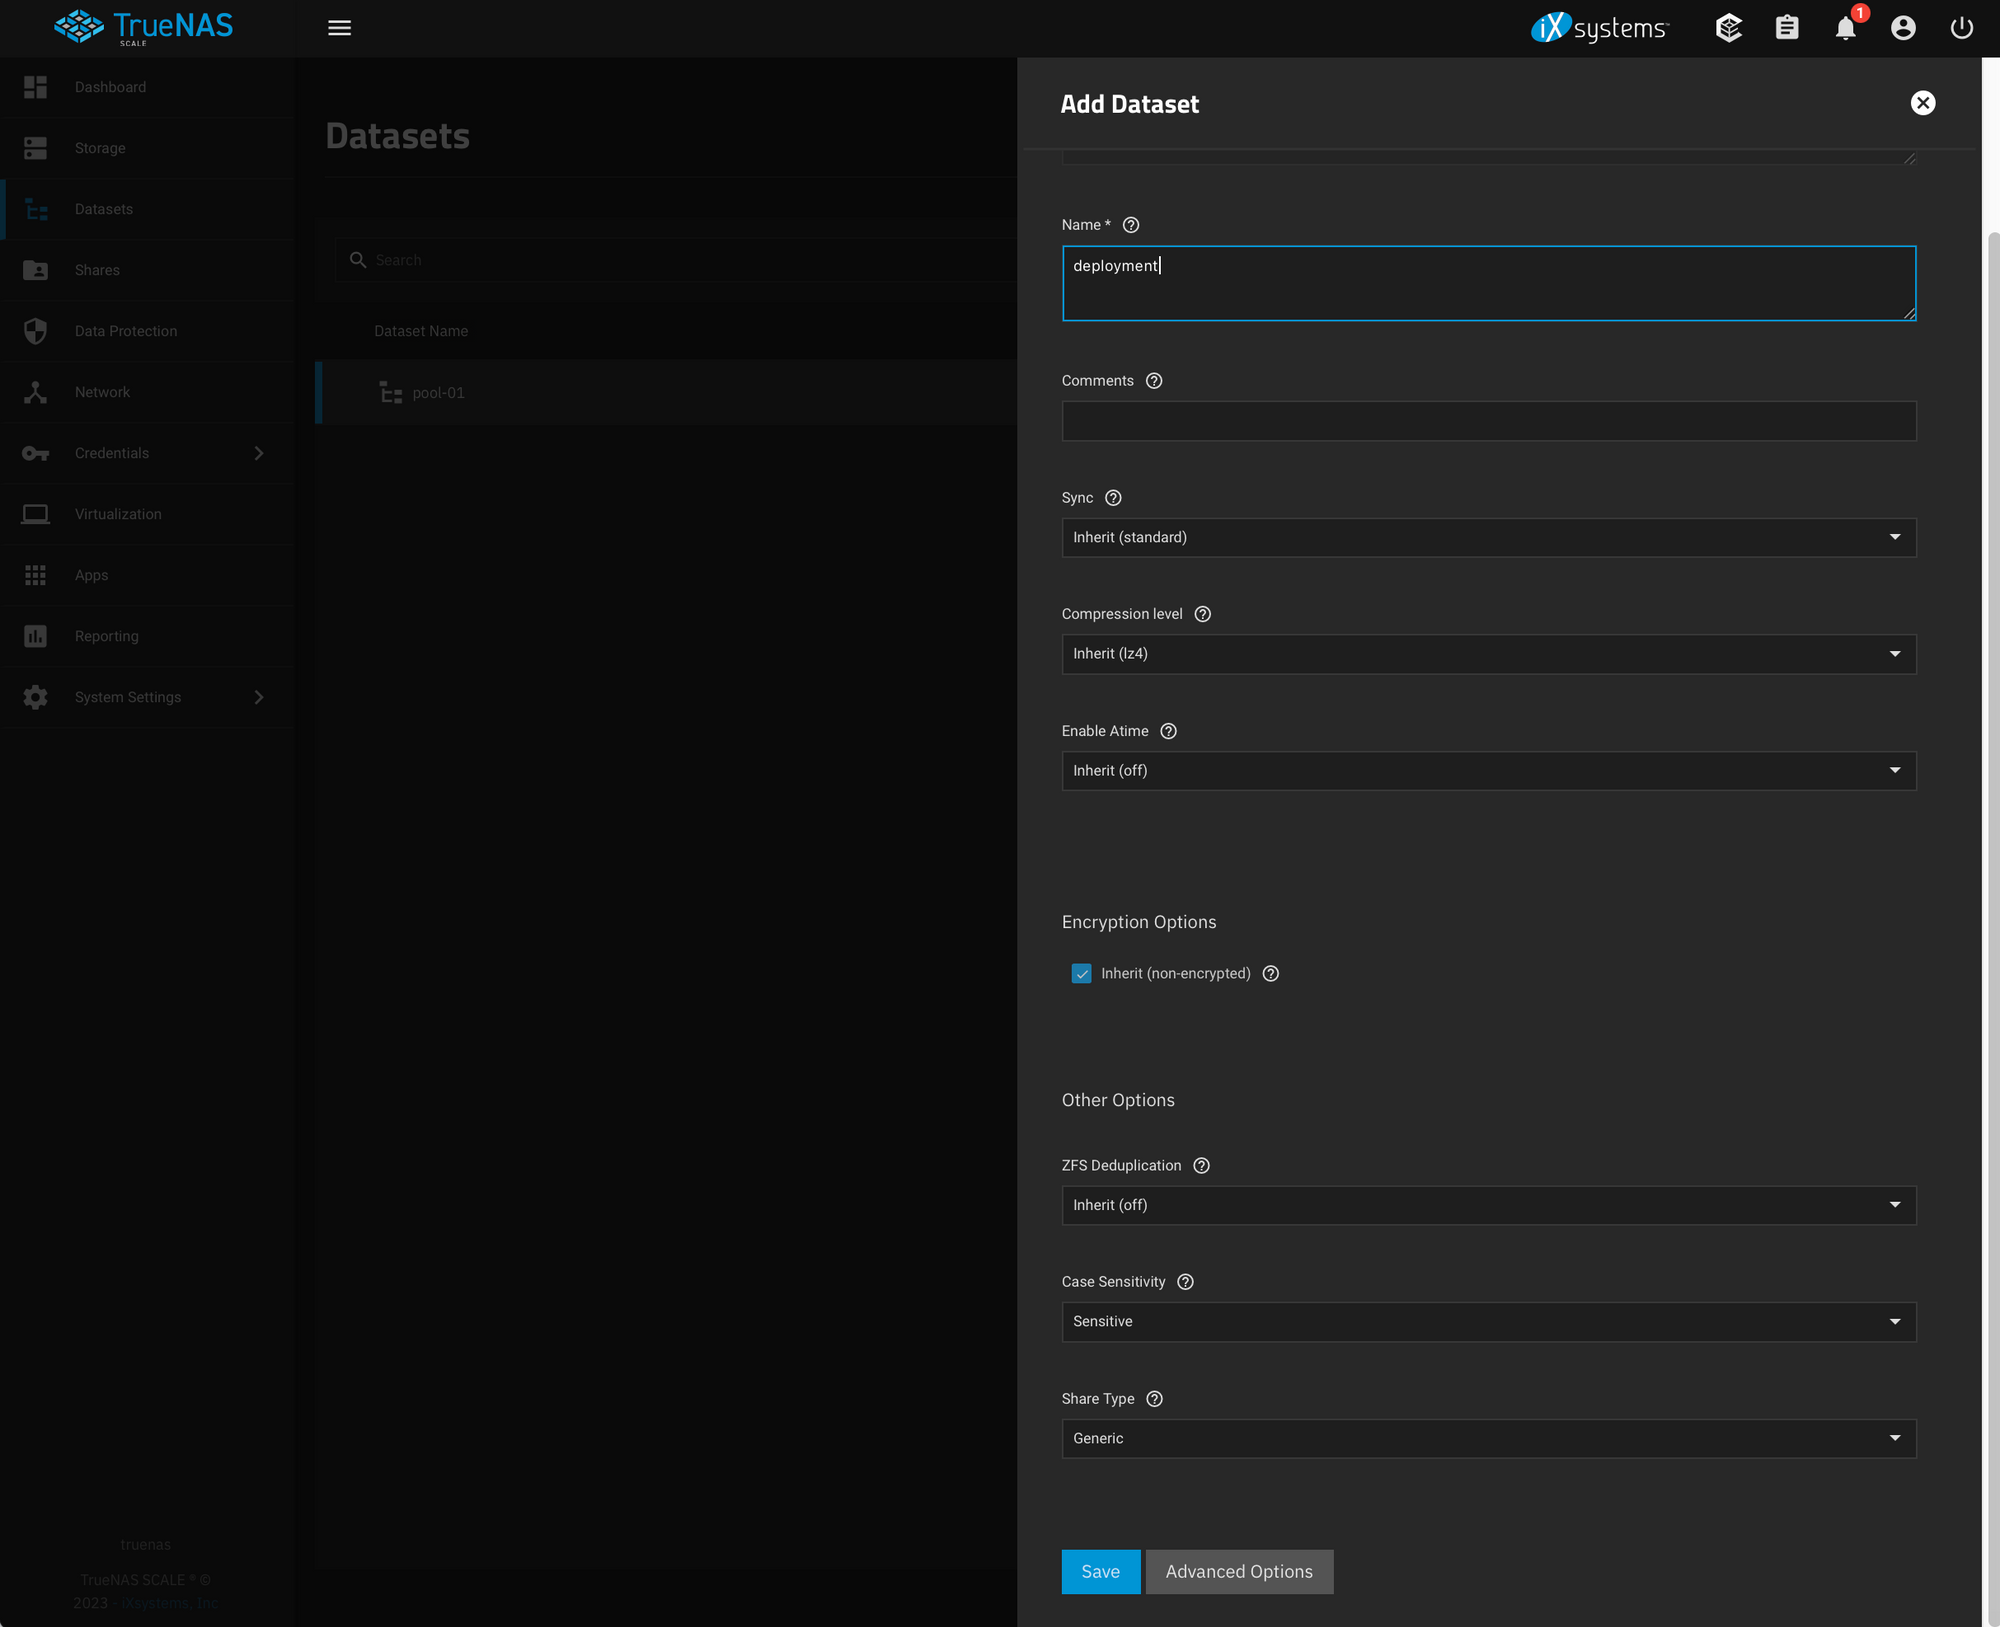
Within that Dataset create 3 more:
-
ftp mirrorpxelinux
Until you've got something that looks like this:
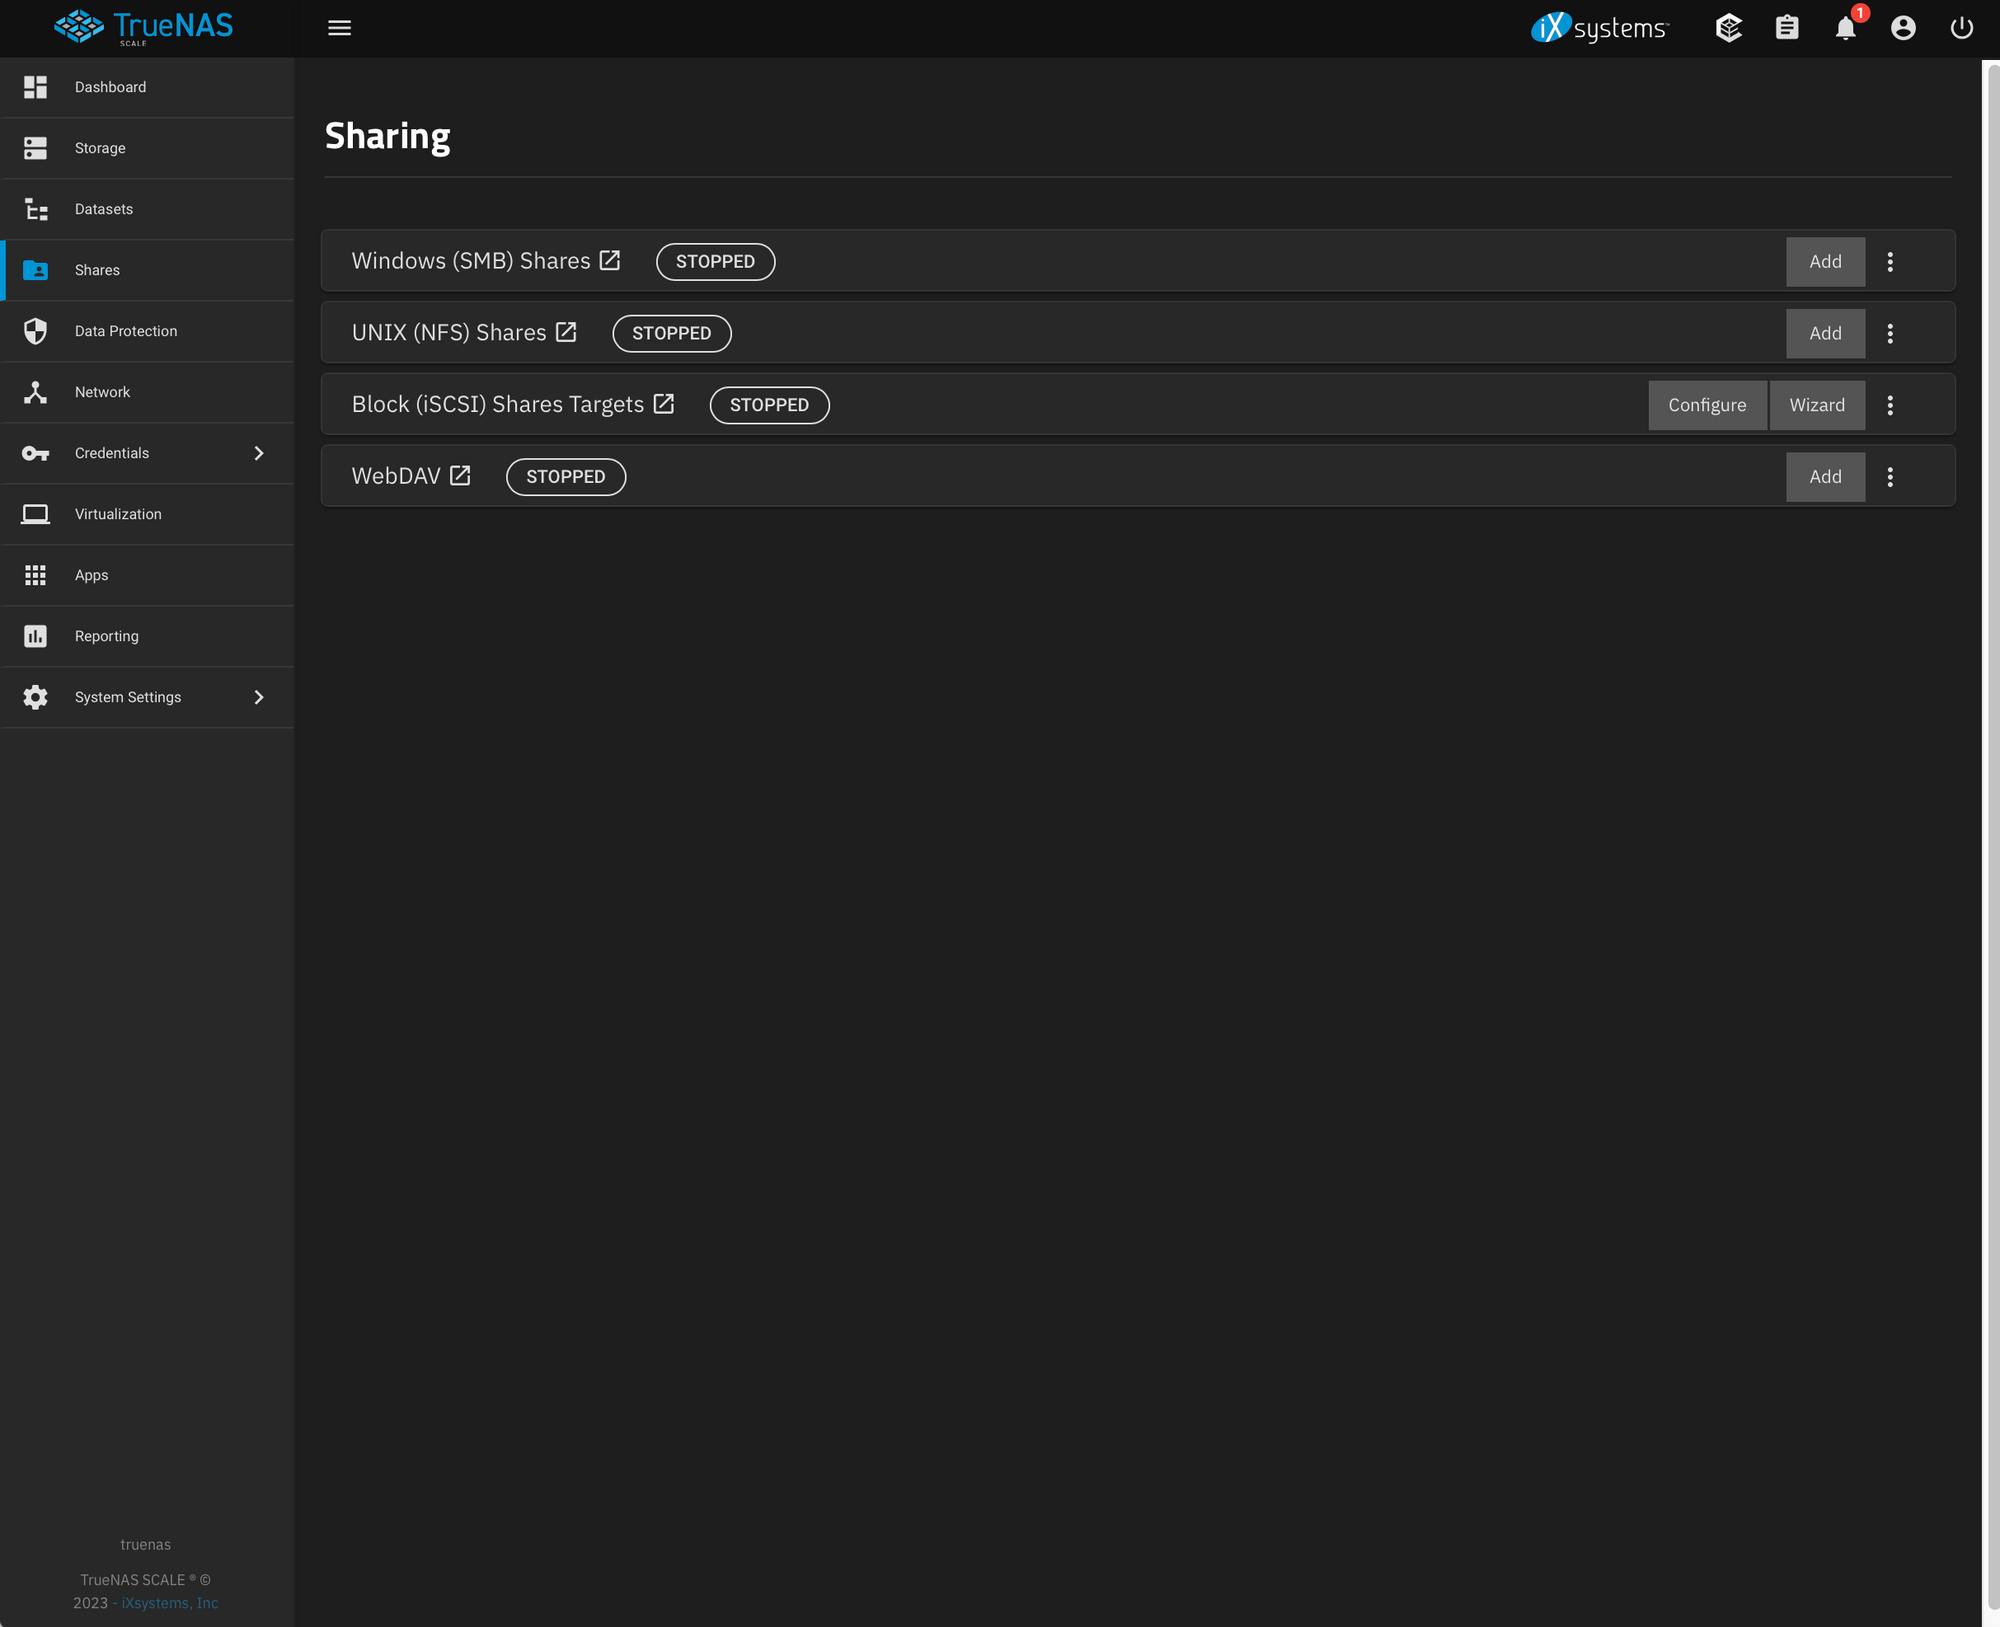
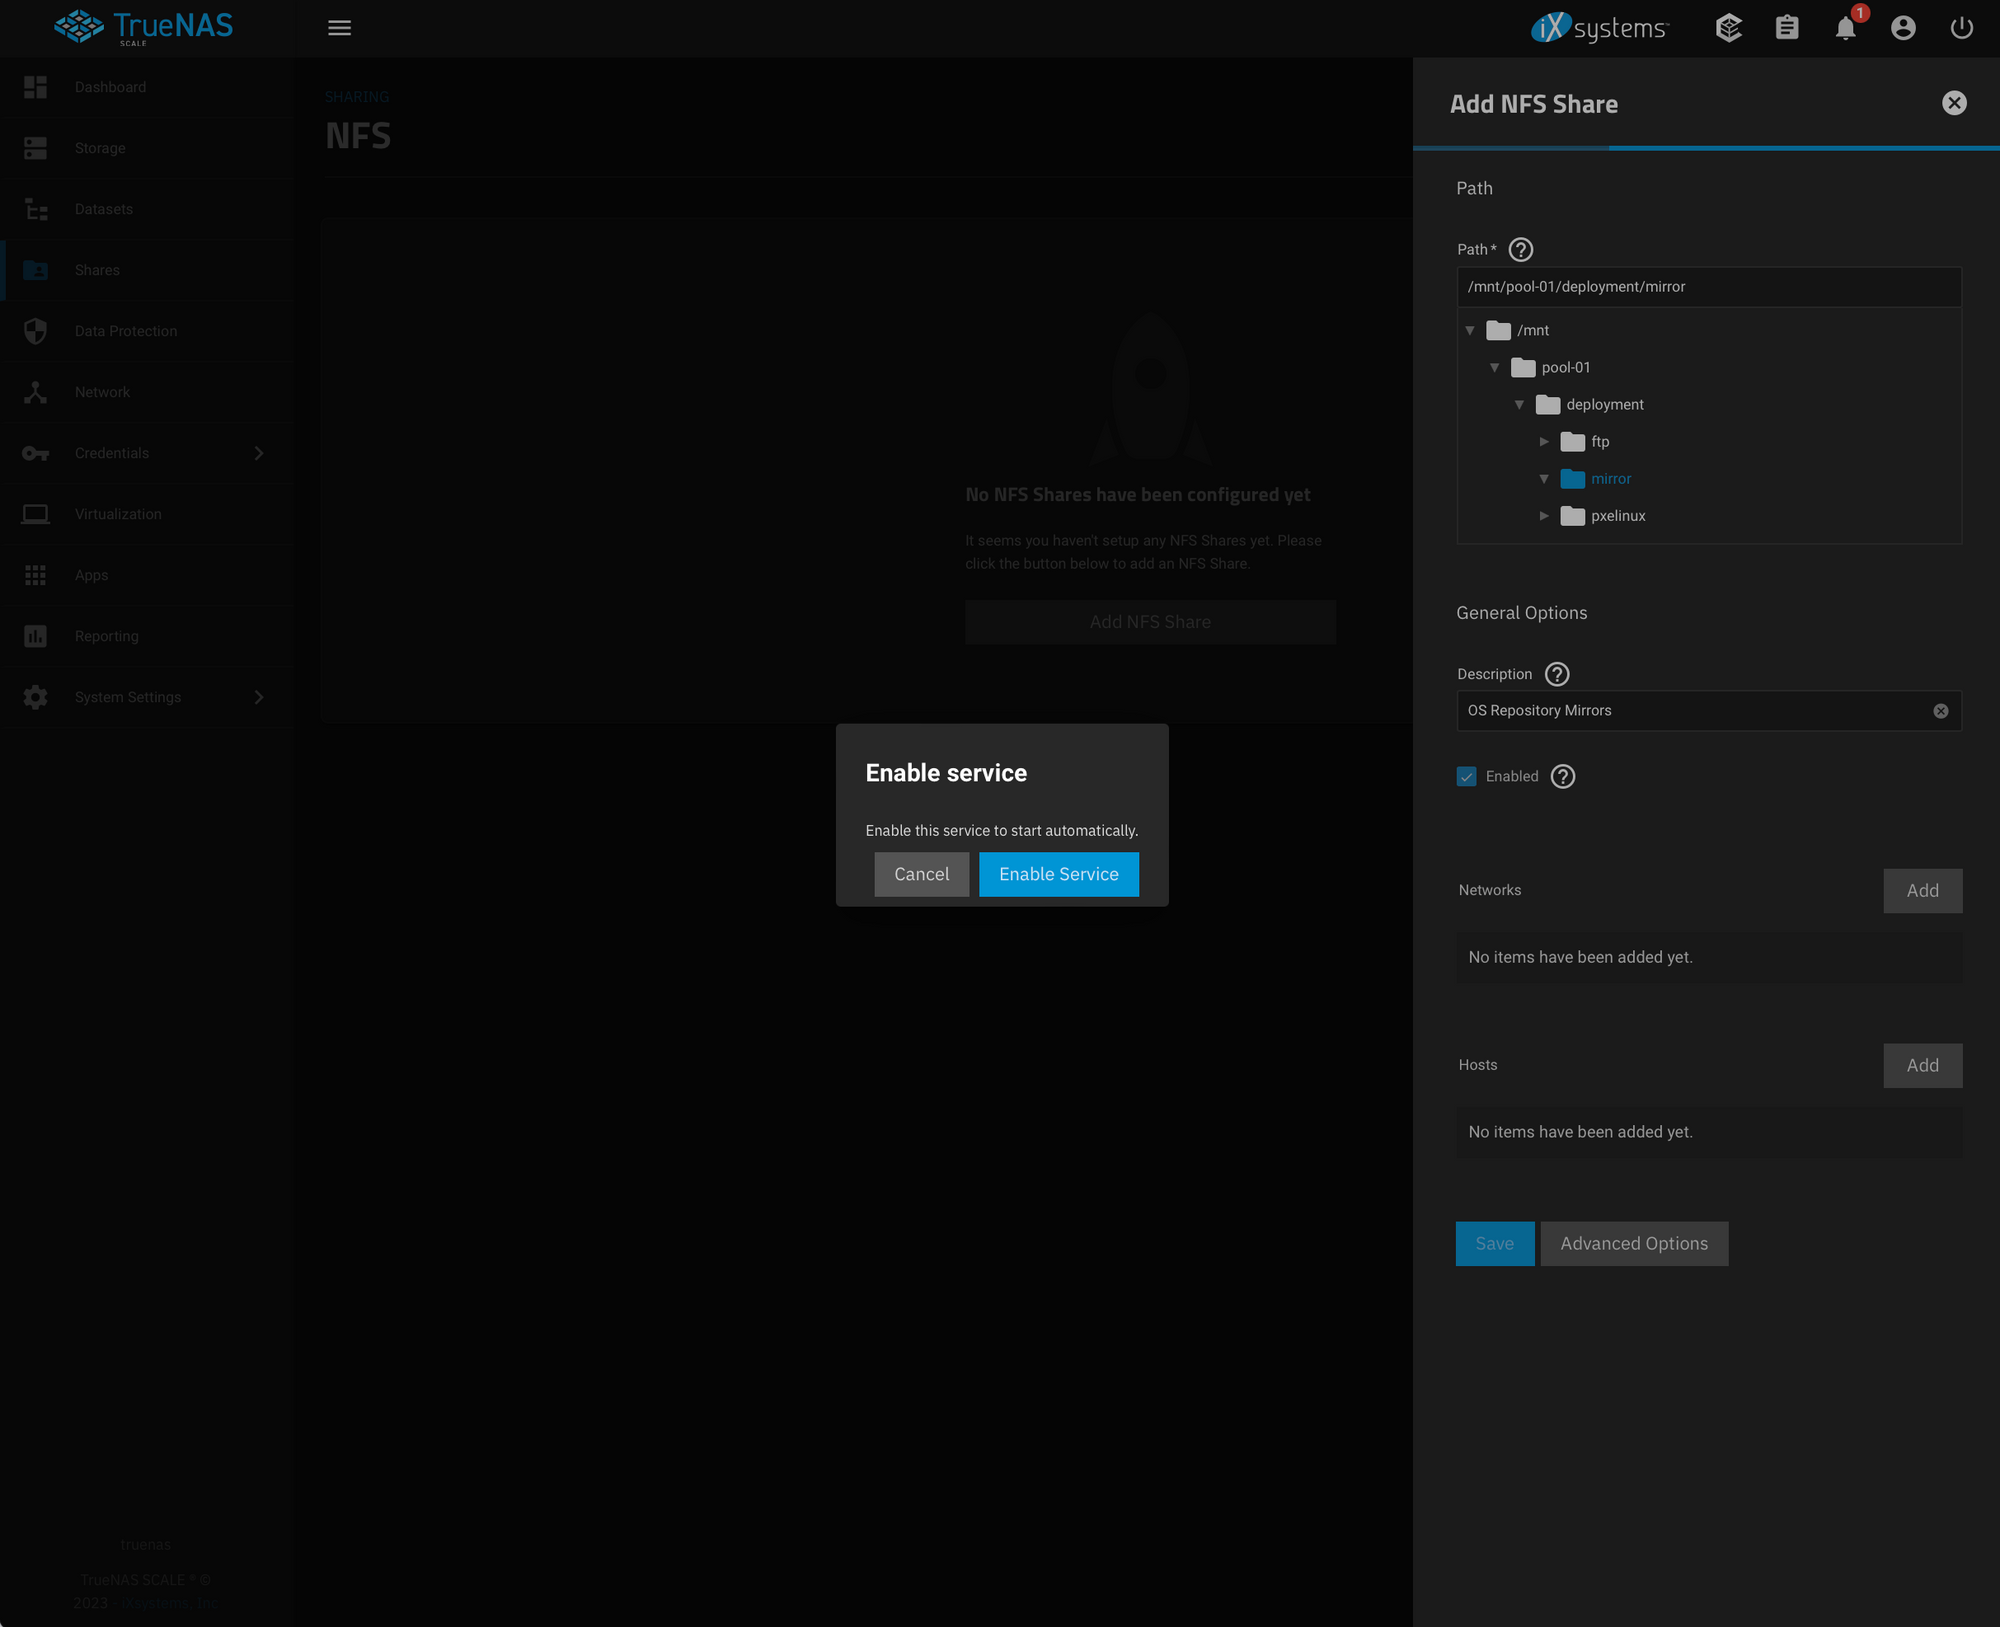
Next, go over to "Shares" on the left-hand navigation and click "Add" off to the right of "UNIX (NFS) Shares".
Go ahead and find the mirror dataset we created under the deployment dataset and click "Save".
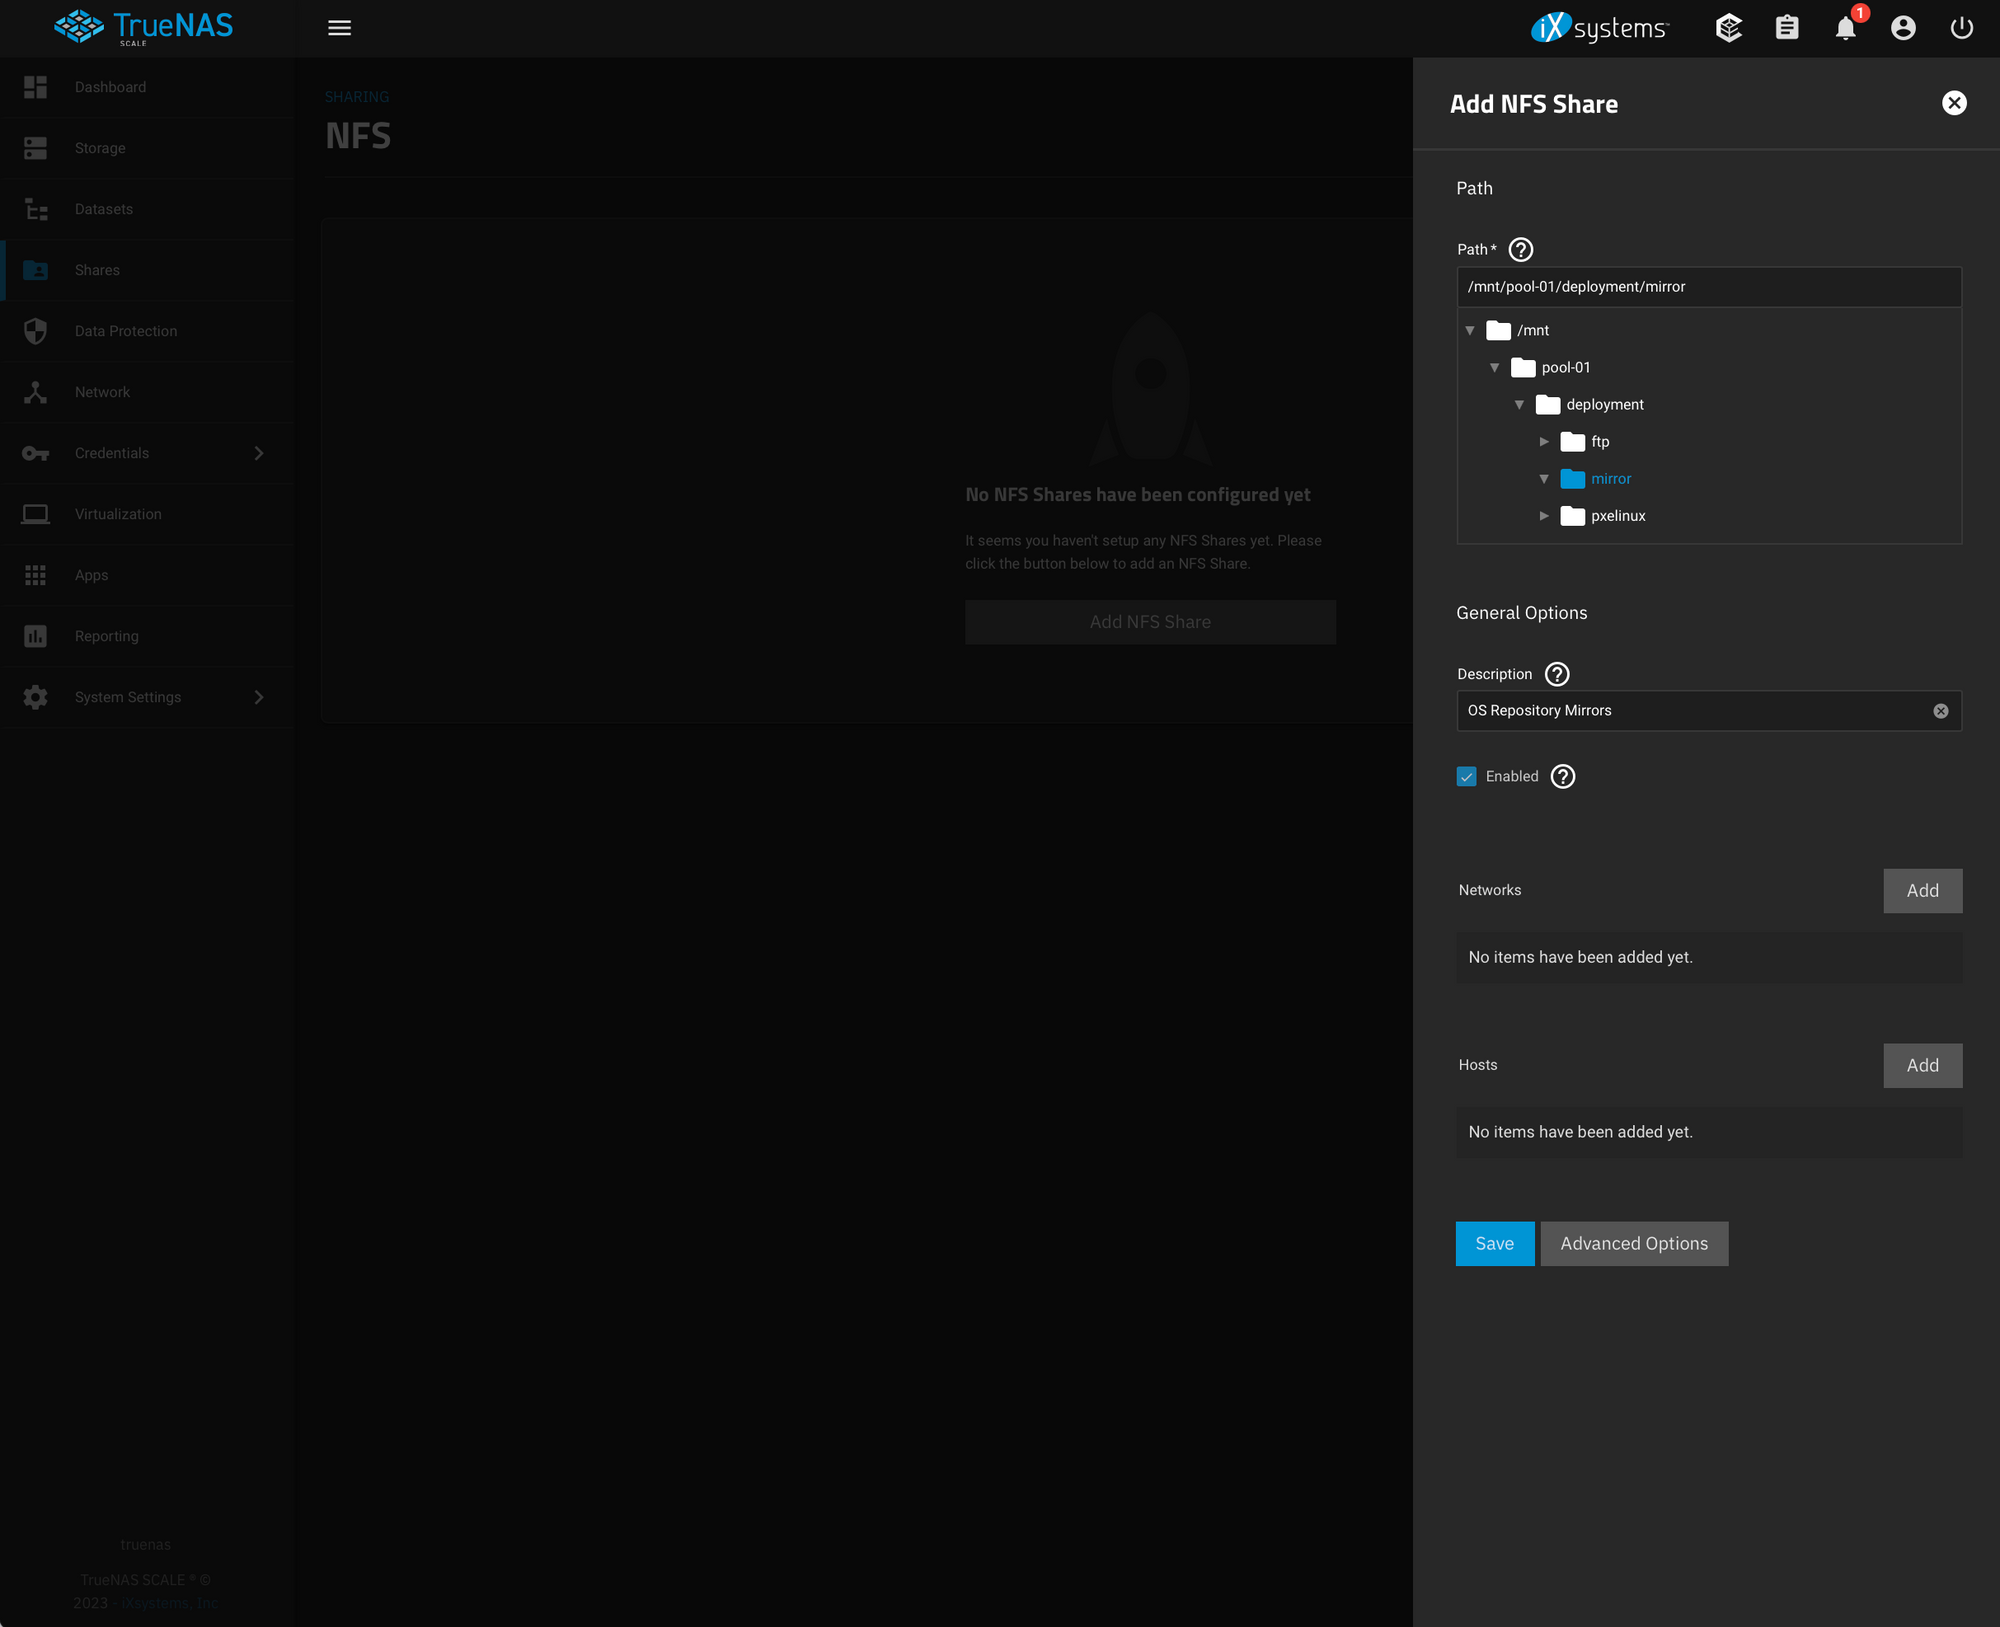
When you do it will ask you if you want to enable the service. Press Enable Service.
Next, go down to System Settings > Services on the left-hand navigation.
You should see something like the following:
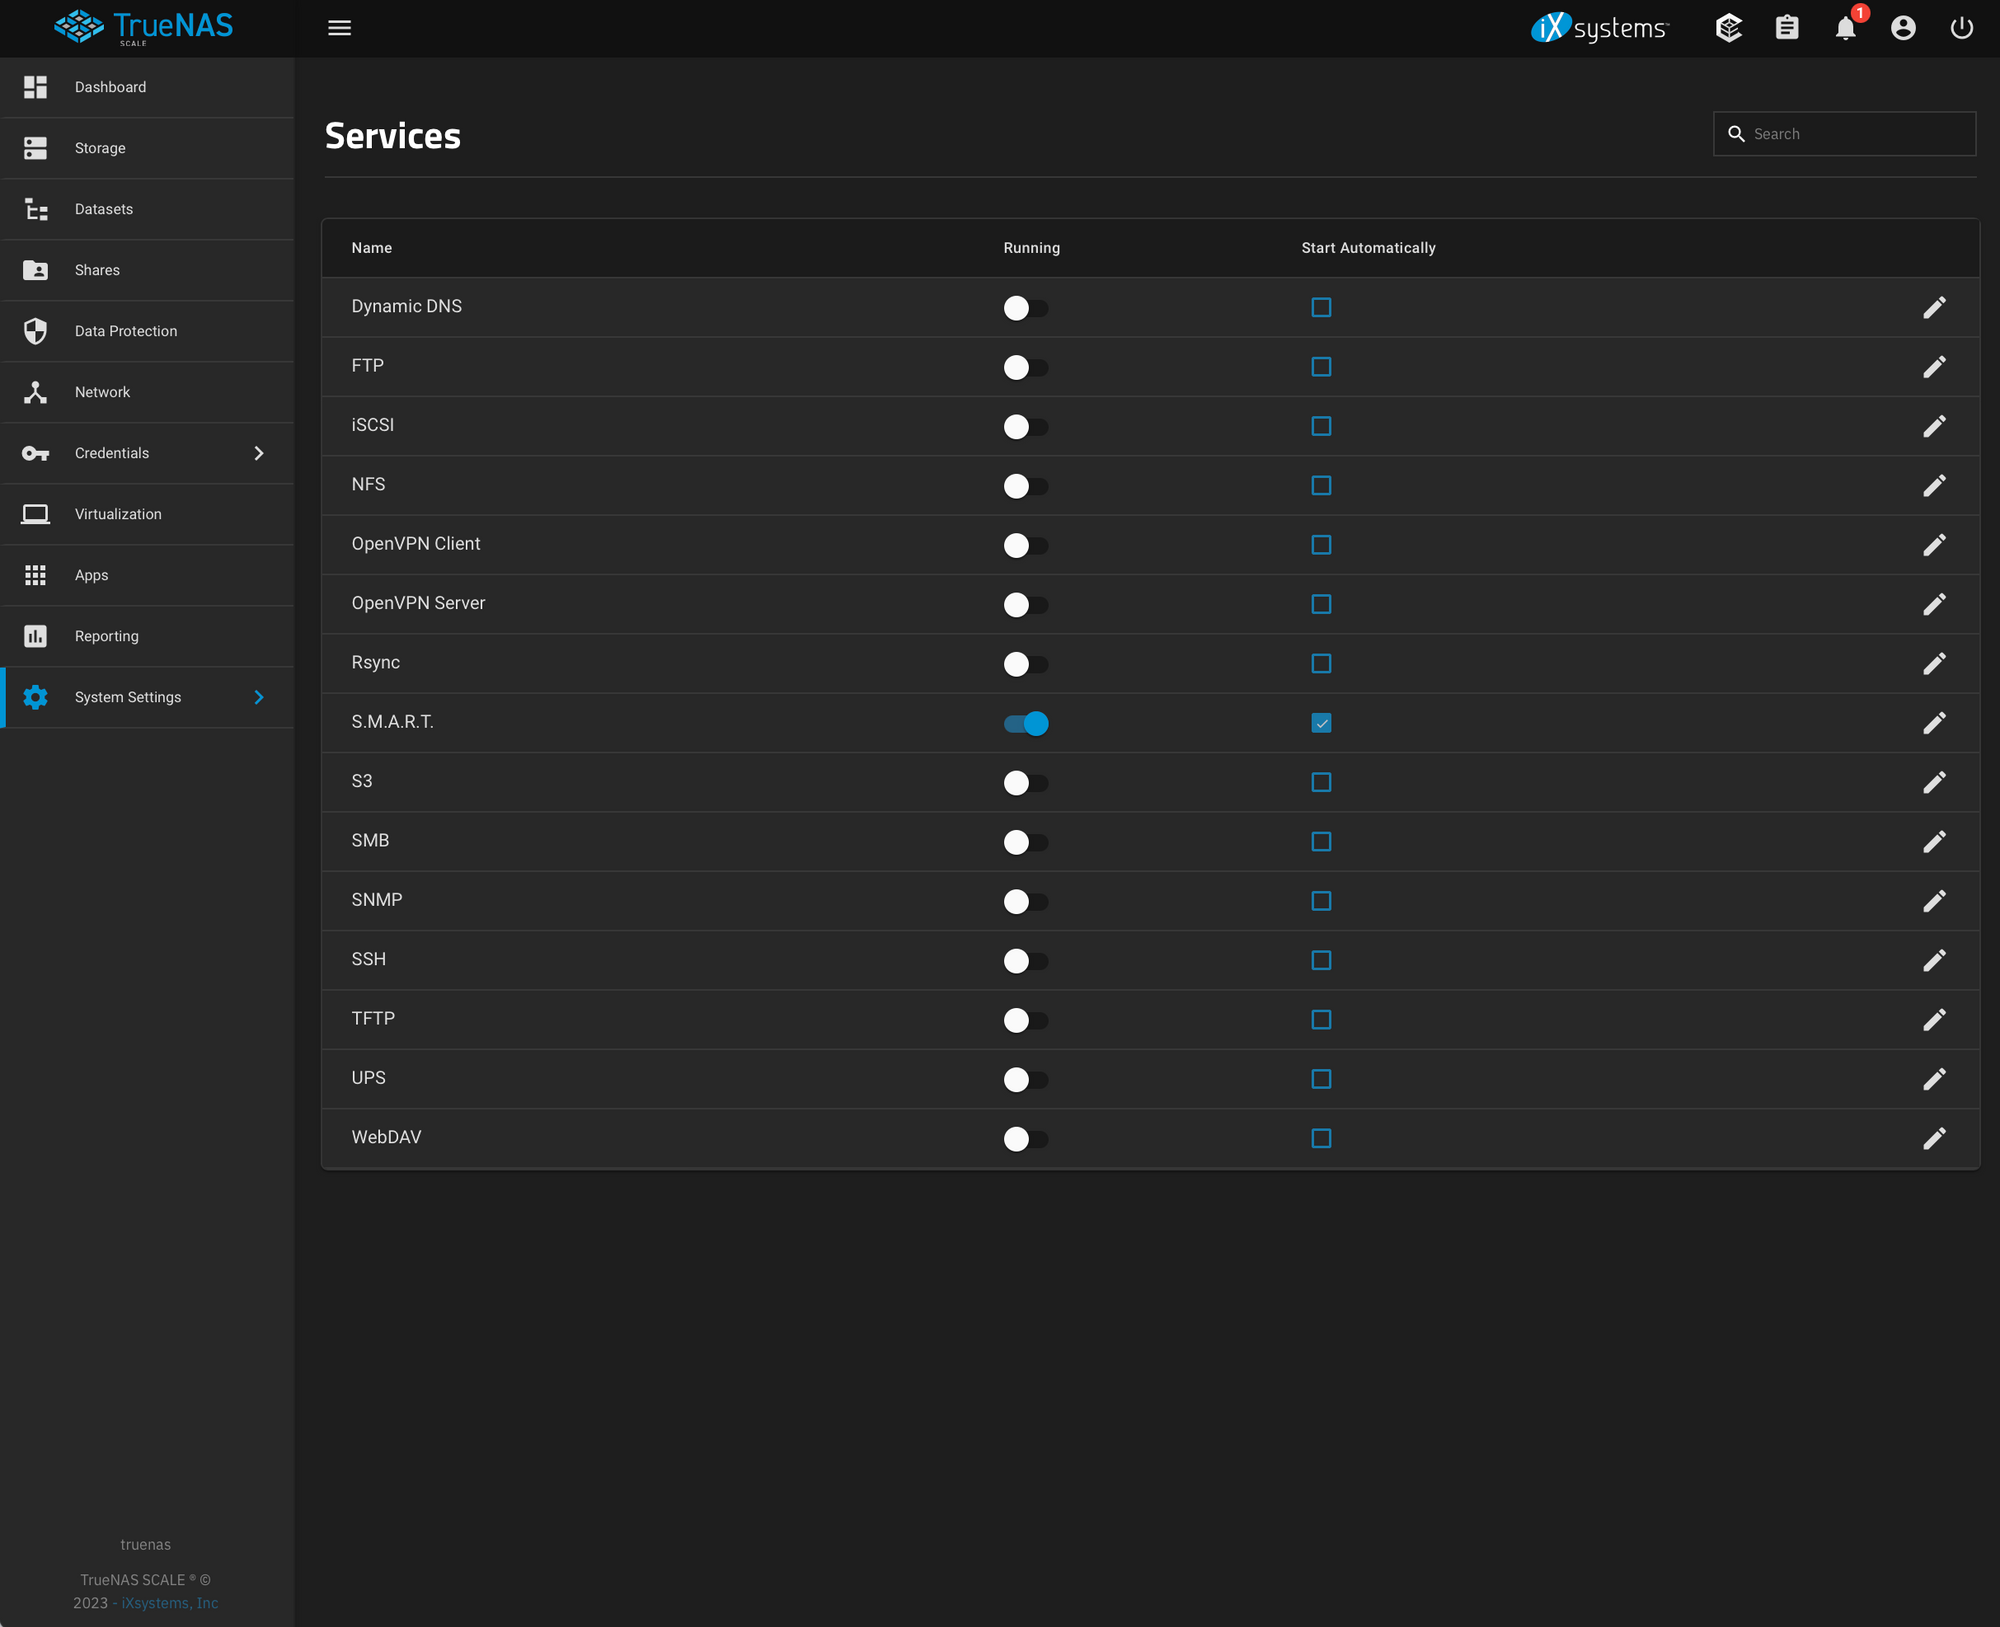
Click the little pencil icon to the right of "TFTP" to configure the TFTP service.
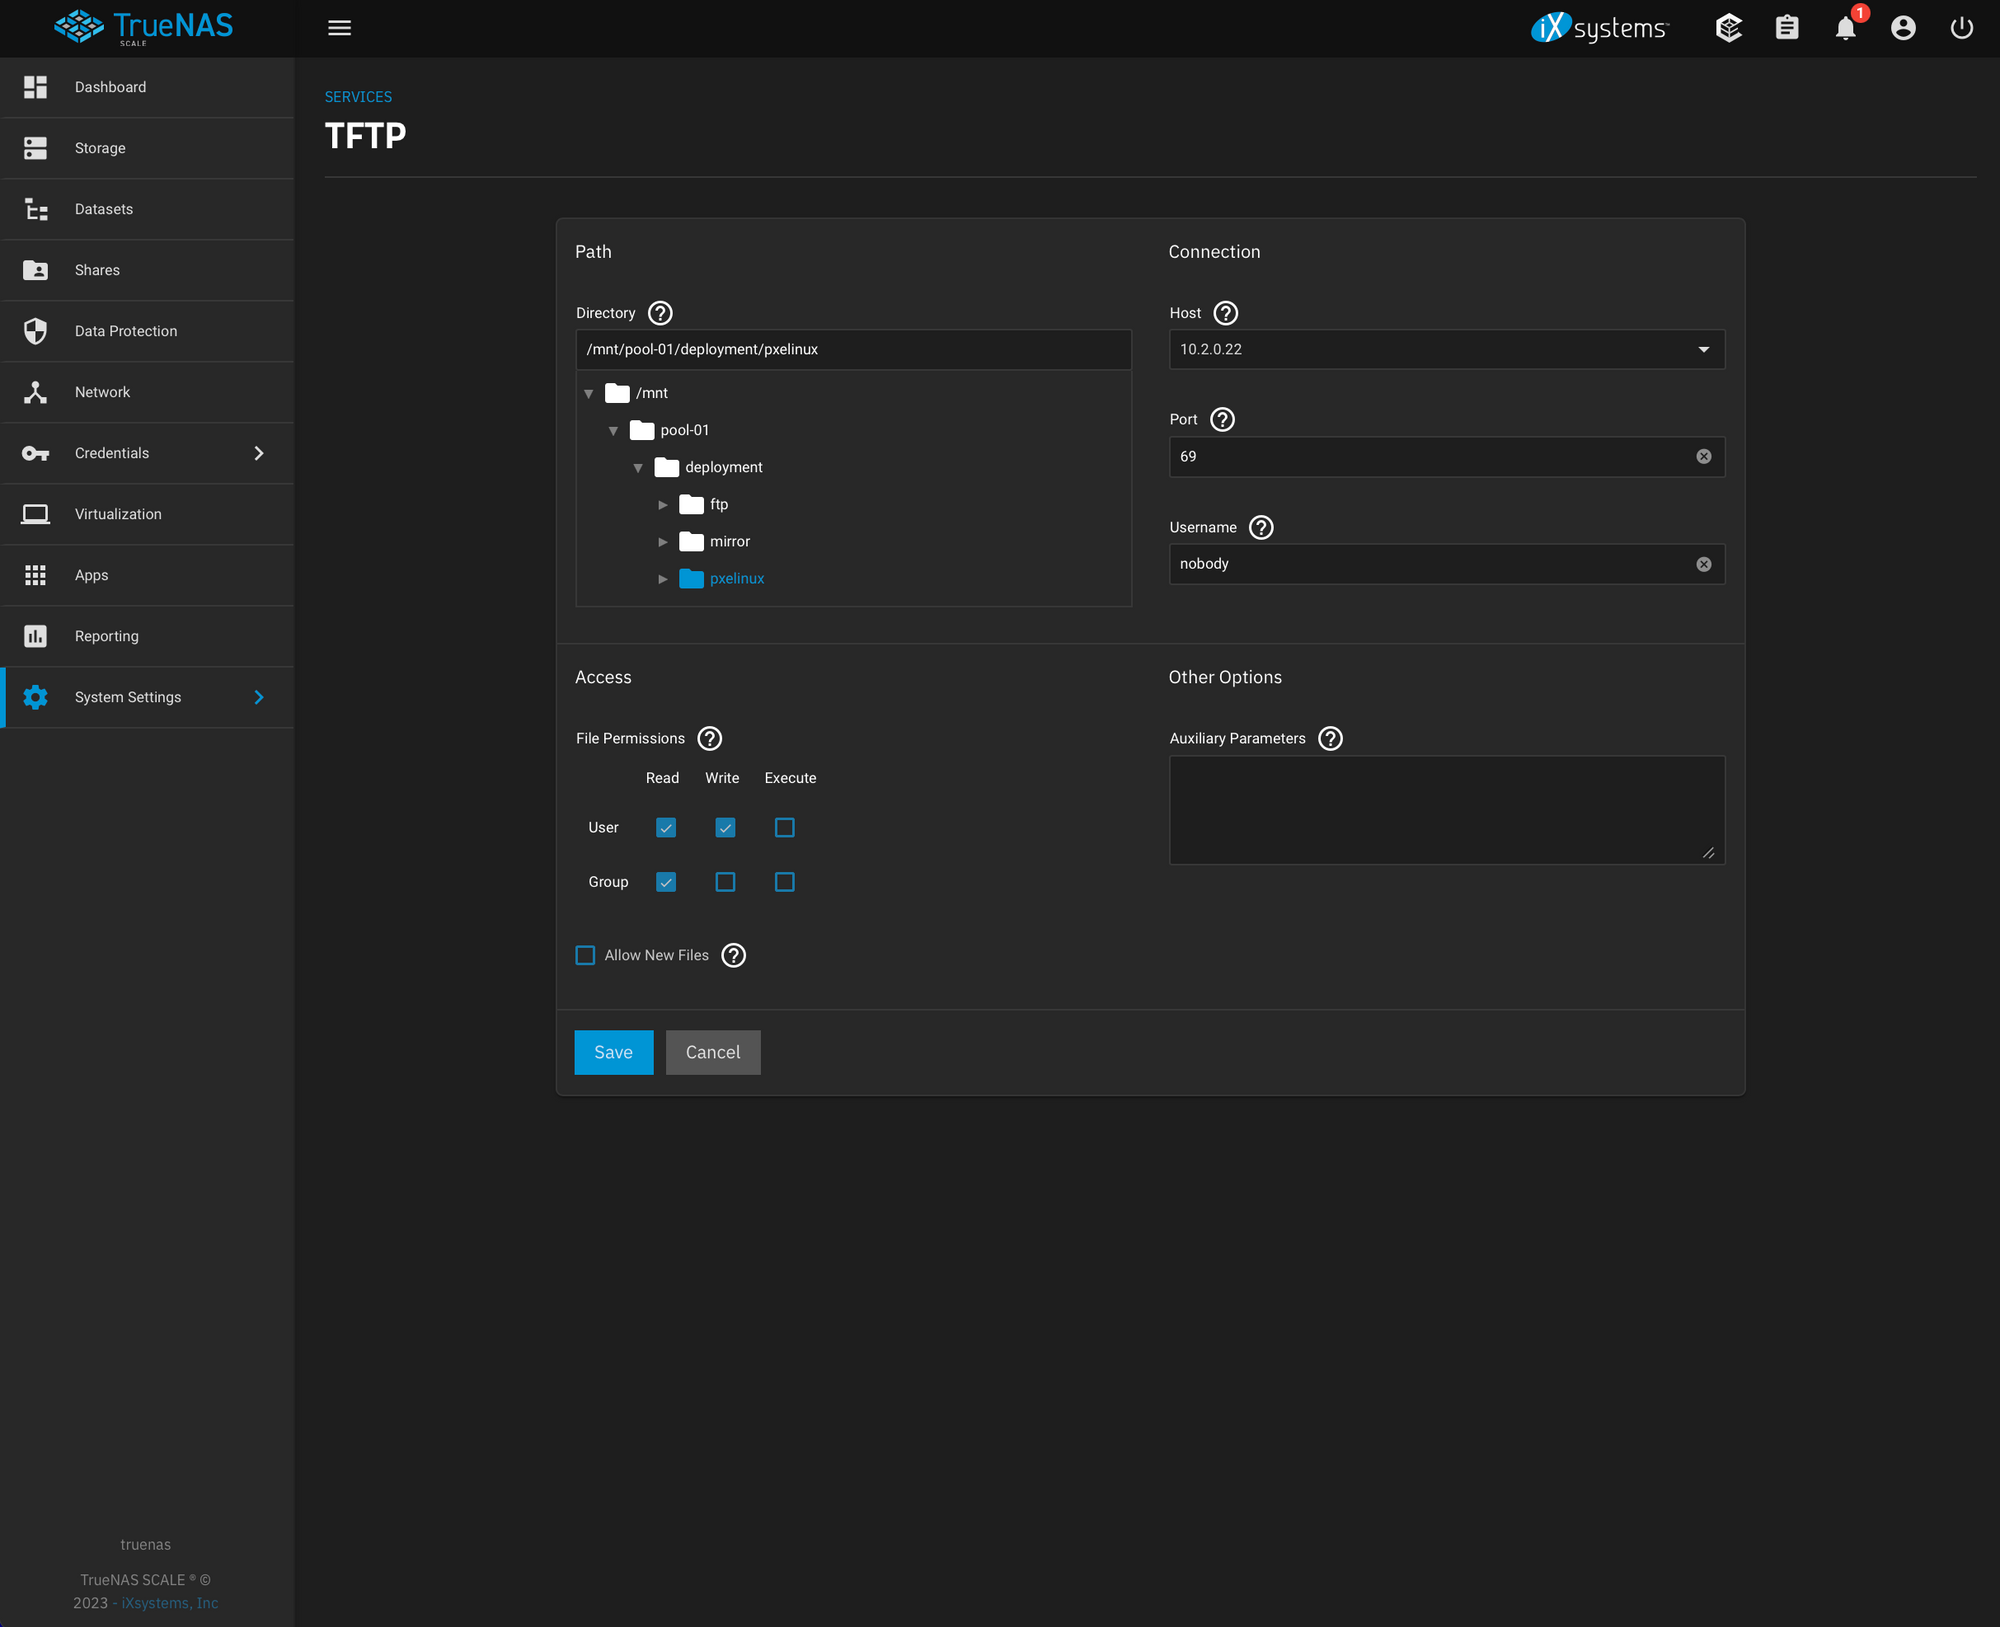
Go ahead and find the pxelinux dataset we created under the deployment and select the correct IP under Host and click Save.
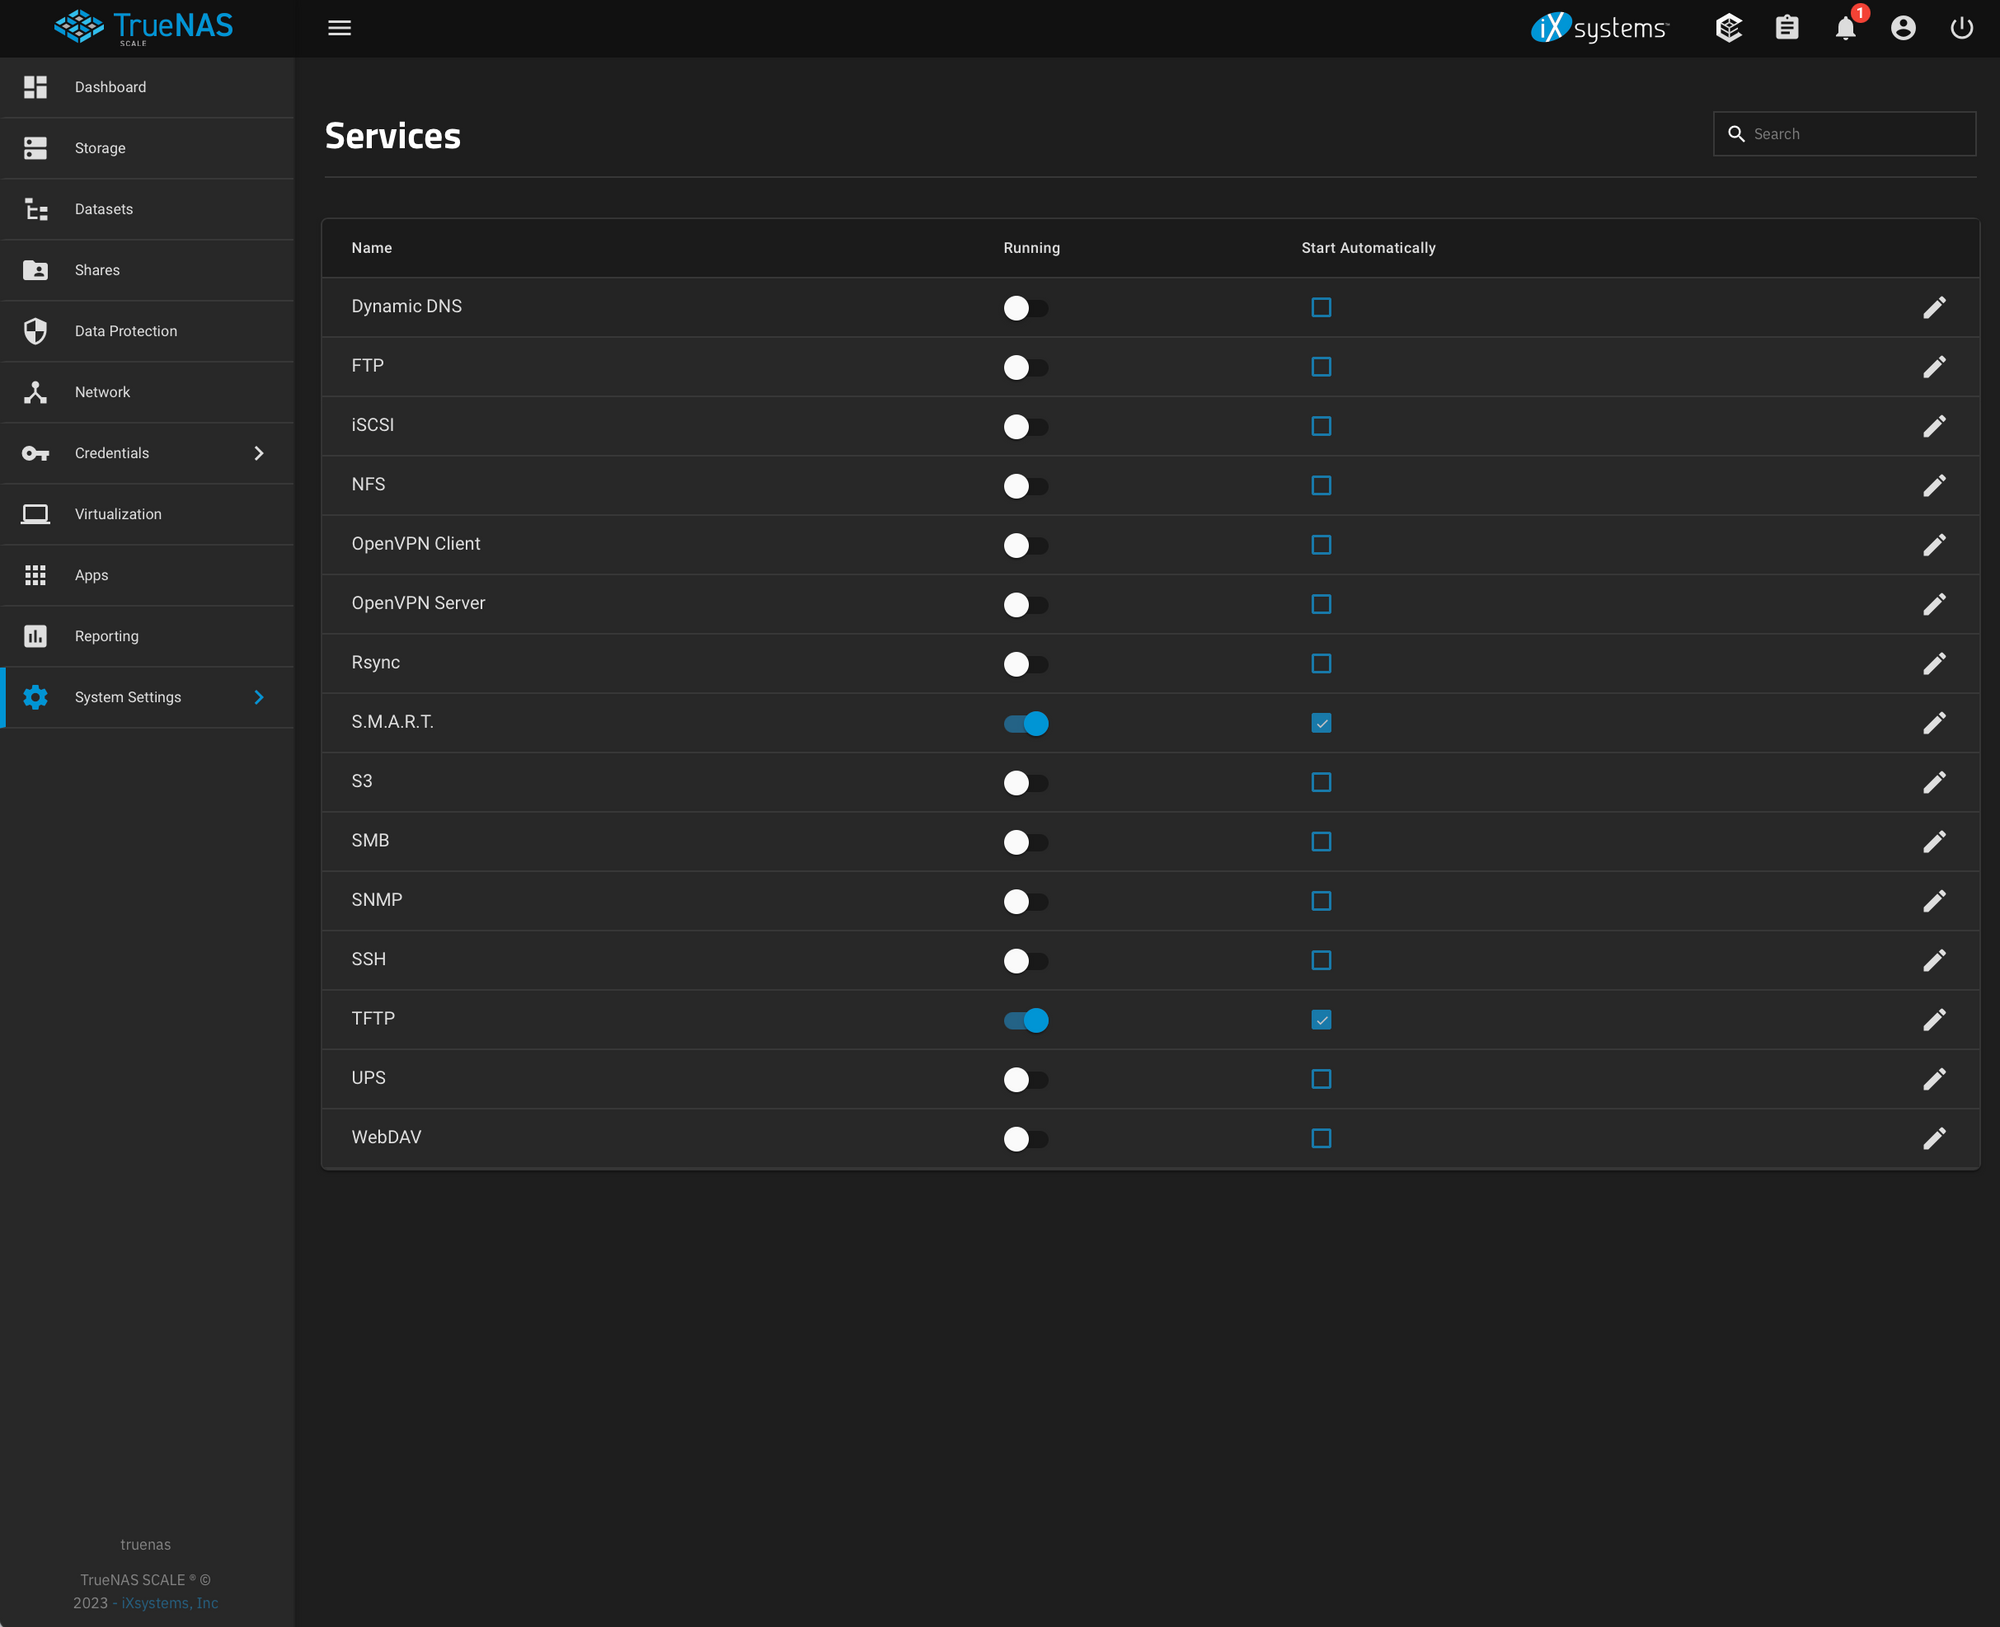
Select the on/off switch under the Running column and also check the checkbox under Start Automatically on the row for TFTP.
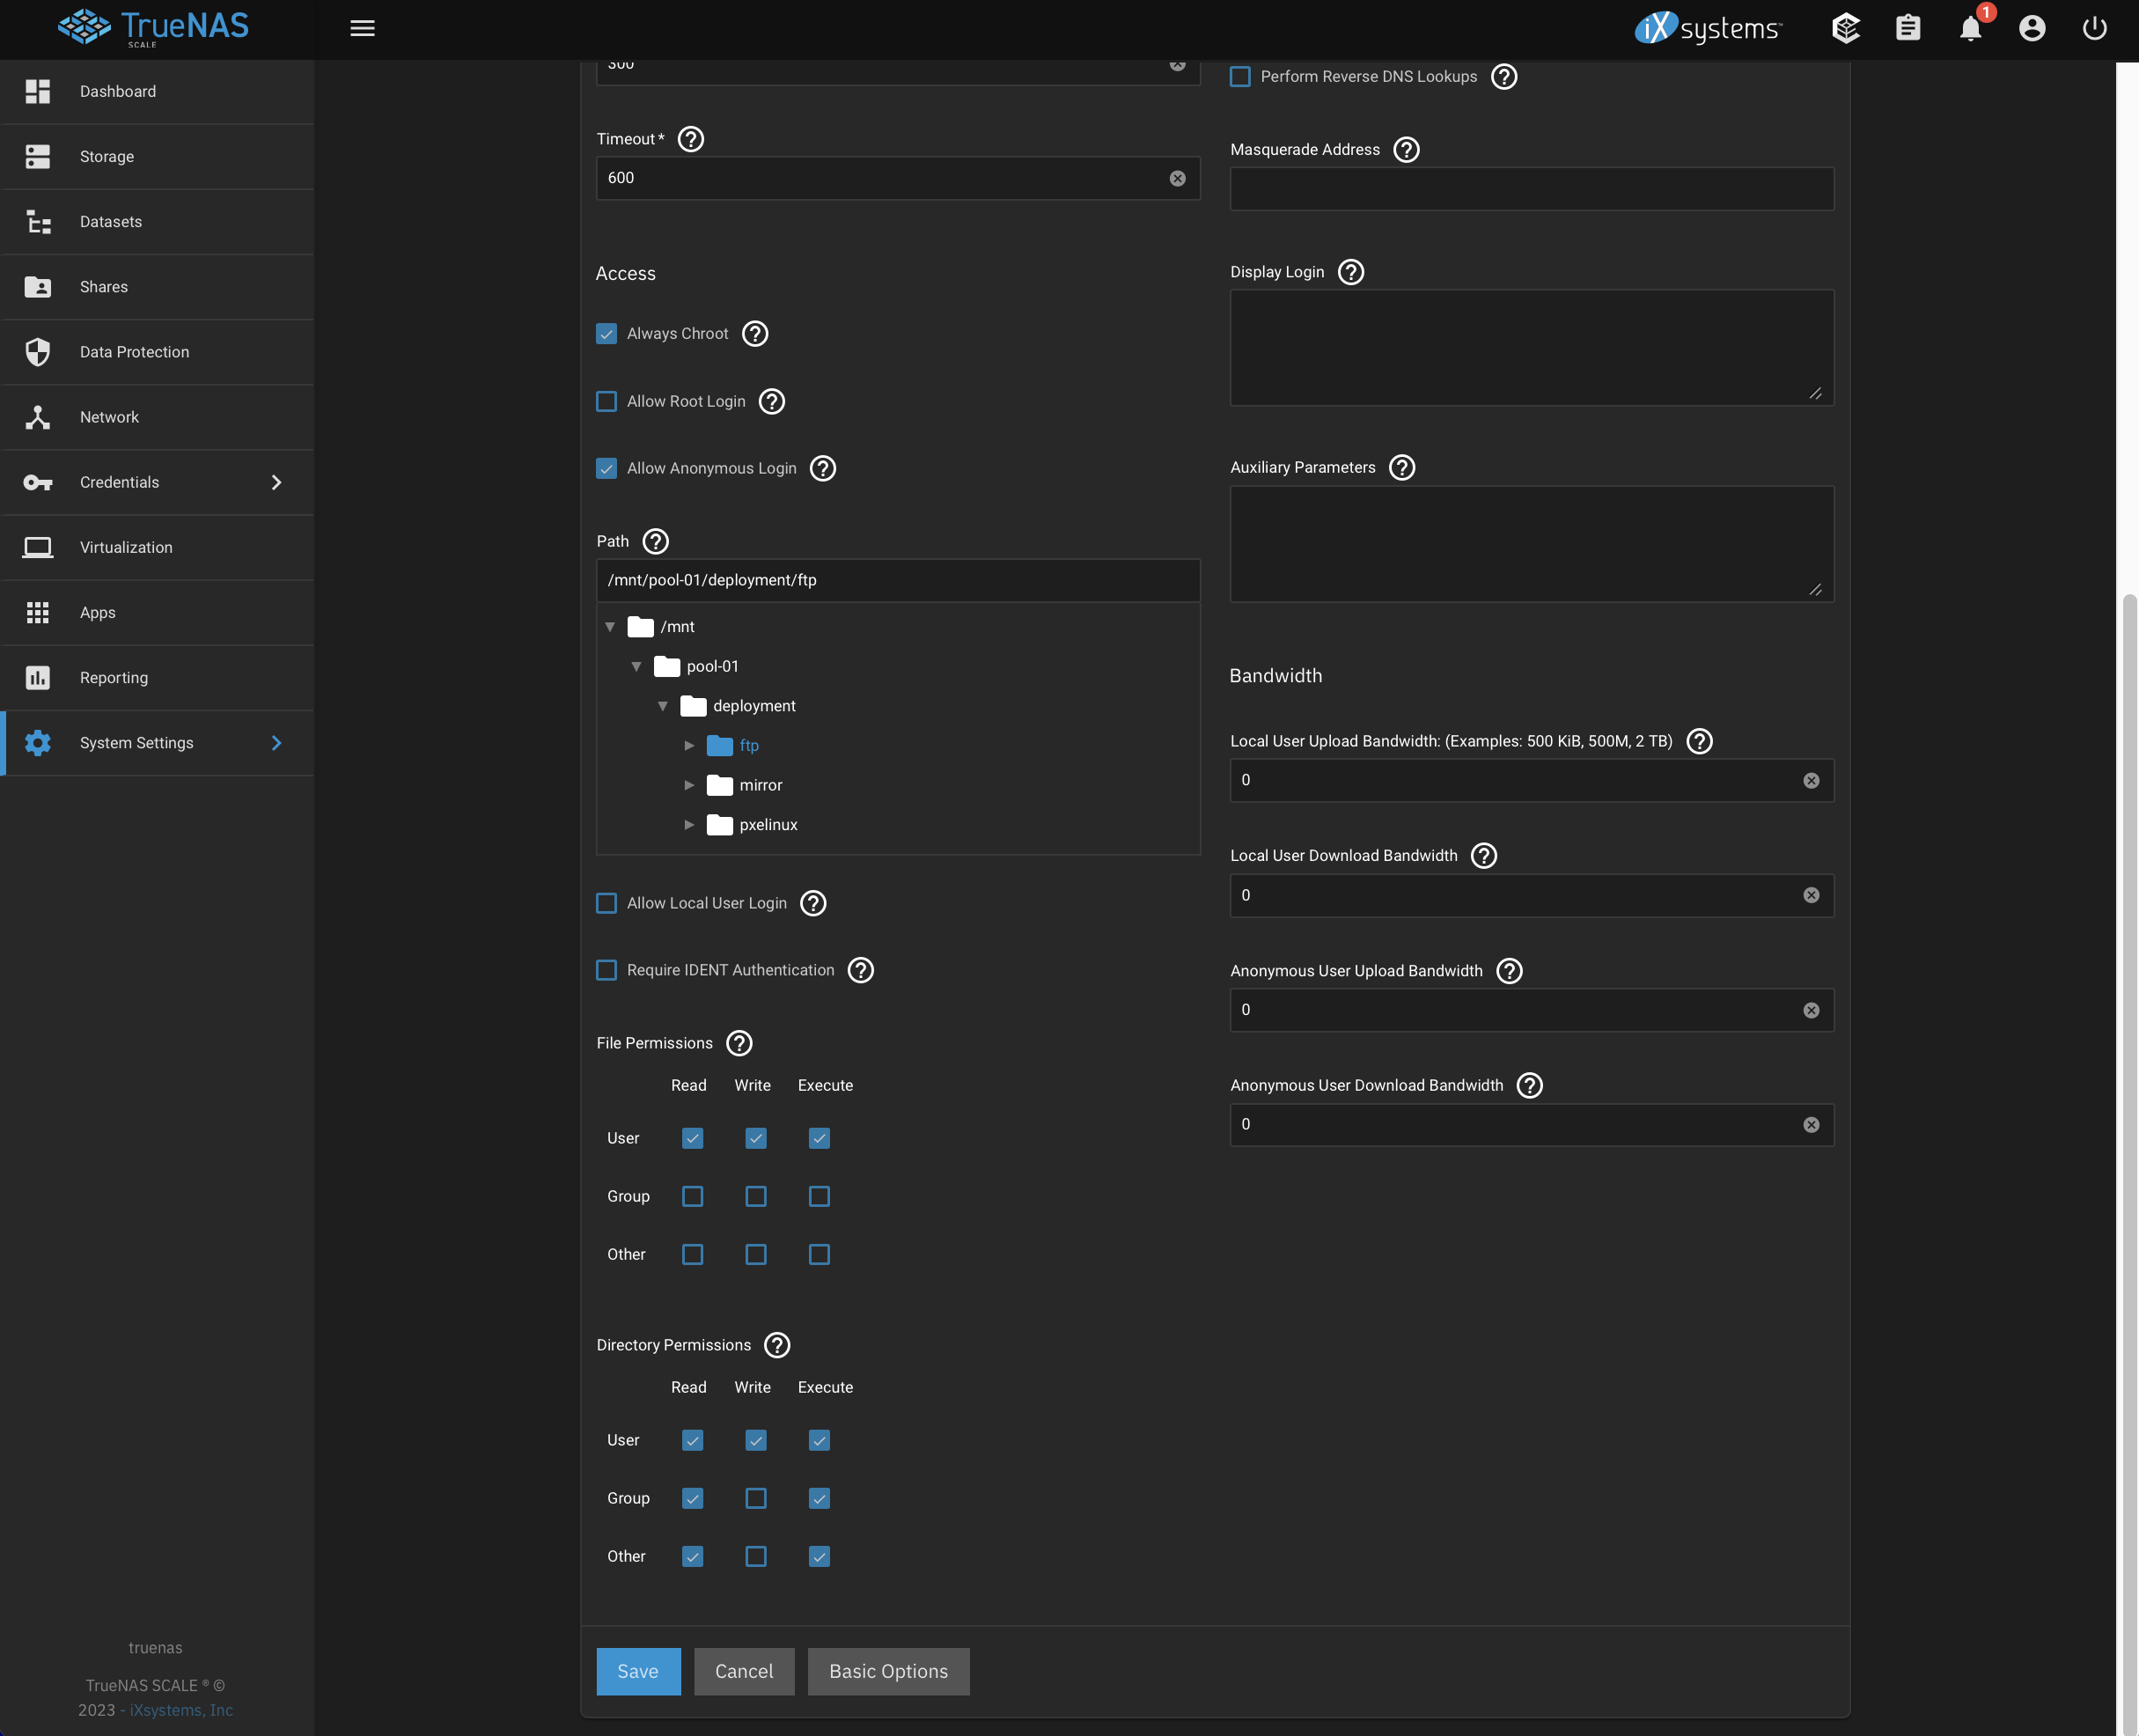
Finally, go up to FTP and click the pencil to edit. At the bottom expand the Advanced Options and (1) check Allow Anonymous Login and (2) select the ftp dataset we created under deployment.
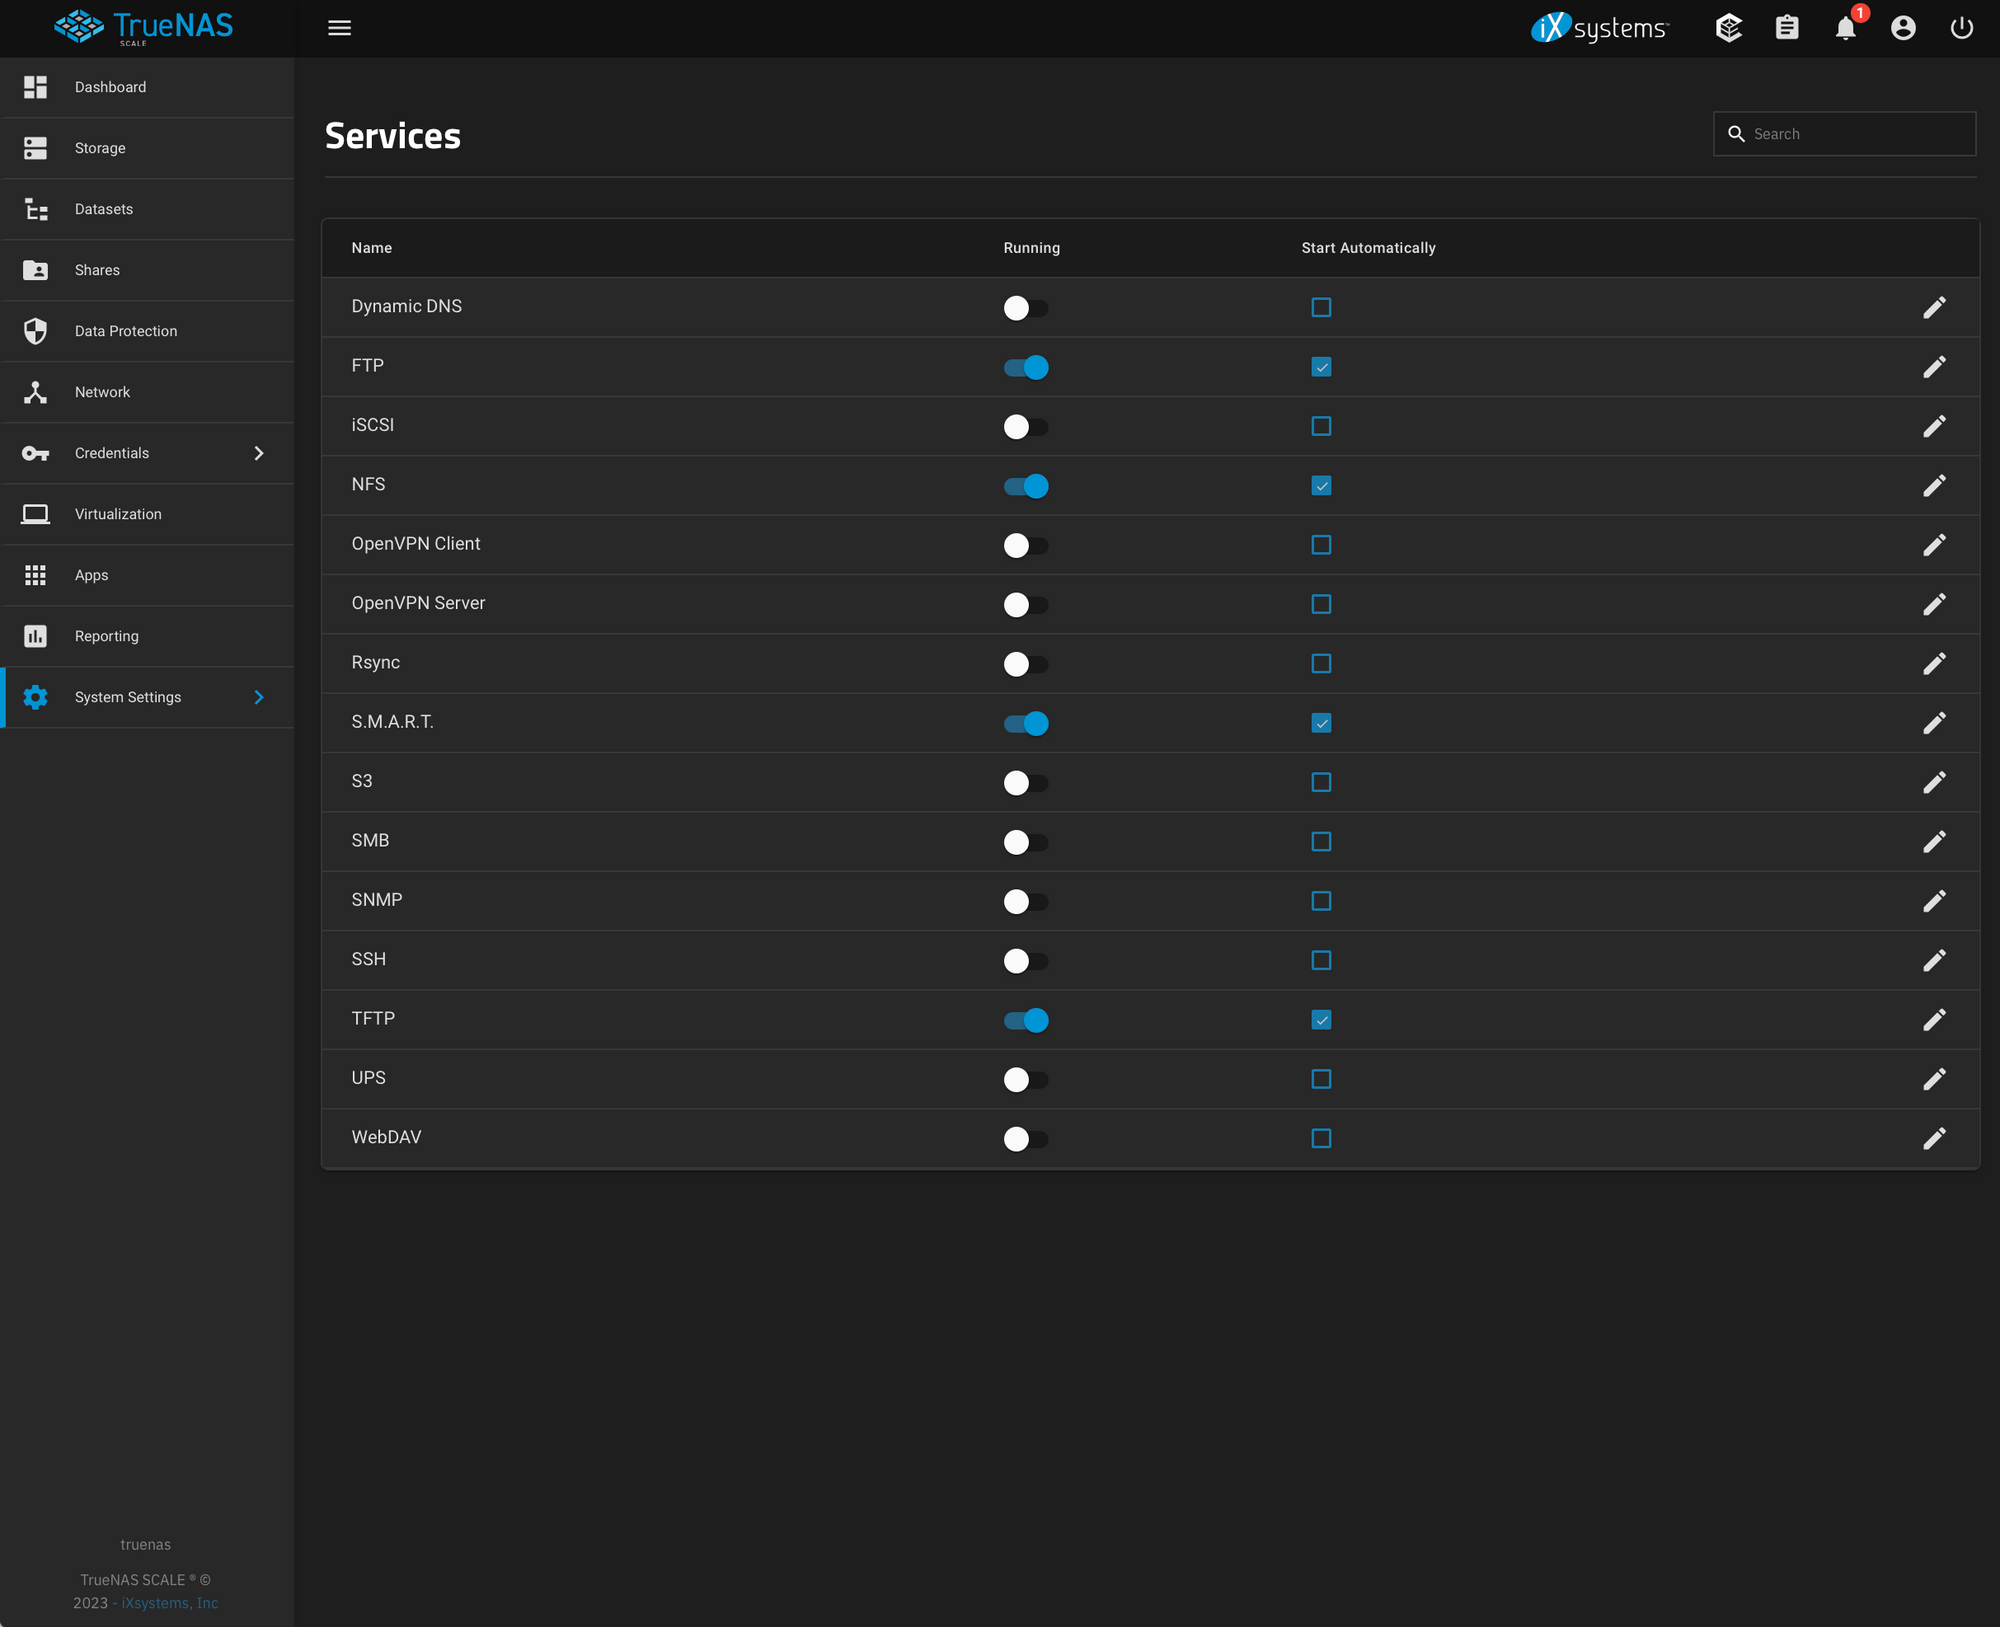
Afterward, navigate back to System Settings > Services and check the on/off switch under the Running column and the checkbox on Start Automatically so you have something that looks like this:
Perfect! You now have all the services you need running you're just not hosting any of the files yet. We'll cover this in the next section.
If you chose to do all this on your own by hand then now you can tune back in for configuring the server.
Deploying Your PXELinux Files
The PXE Configuration File: /pxelinux.cfg/default
This is where you're going to give the general deployment options that you are going to select when booting up a new install. You're going to want to outline all possible deployment scenarios here because this is the only human interaction involved in the whole process if you choose an automated install. If the configuration you want isn't listed here you're going to have to select a guided installation and walk through it by hand. This isn't the end of the world but it's a much nicer experience with a fully automated install I've found. After all, you've set up a deployment server, you should be enjoying the fruits of your labor, right? :)
timeout 600
display boot.msg
default 4
prompt  1

label 1
  menu label ^Install RHEL 9.1 via Kickstart: Bare Metal
  kernel images/RHEL-9.1/vmlinuz
  append initrd=images/RHEL-9.1/initrd.img ip=dhcp inst.ks=ftp://10.2.0.8/ks/el9/ks-baremetal.cfg

label 2
  menu label ^Install RHEL 9.1 via Kickstart: Virtual Machine
  kernel images/RHEL-9.1/vmlinuz
  append initrd=images/RHEL-9.1/initrd.img ip=dhcp inst.ks=ftp://10.2.0.8/ks/el9/ks-vm.cfg

label 3
  menu label ^Install RHEL 9.0 via local mirror
  kernel images/RHEL-9.0/vmlinuz
  append initrd=images/RHEL-9.0/initrd.img ip=dhcp inst.repo=nfs:10.2.0.6:/mnt/store/deployment/mirror/el9/rhel-9.0/

label 4
  menu label Boot from ^local drive
  localboot 0x80


menu end
A few things to note here. All the paths listed here include boot.msg and images/.. are relative to the PXE boot file given in your DHCP parameters, which was probably pxelinux.0 (we'll get around to all this in the configuration section below). Getting all these files in the right place can be tricky, so just as a time saver, I've created a GitHub repository with a Makefile to automate this for you.
 kriipke
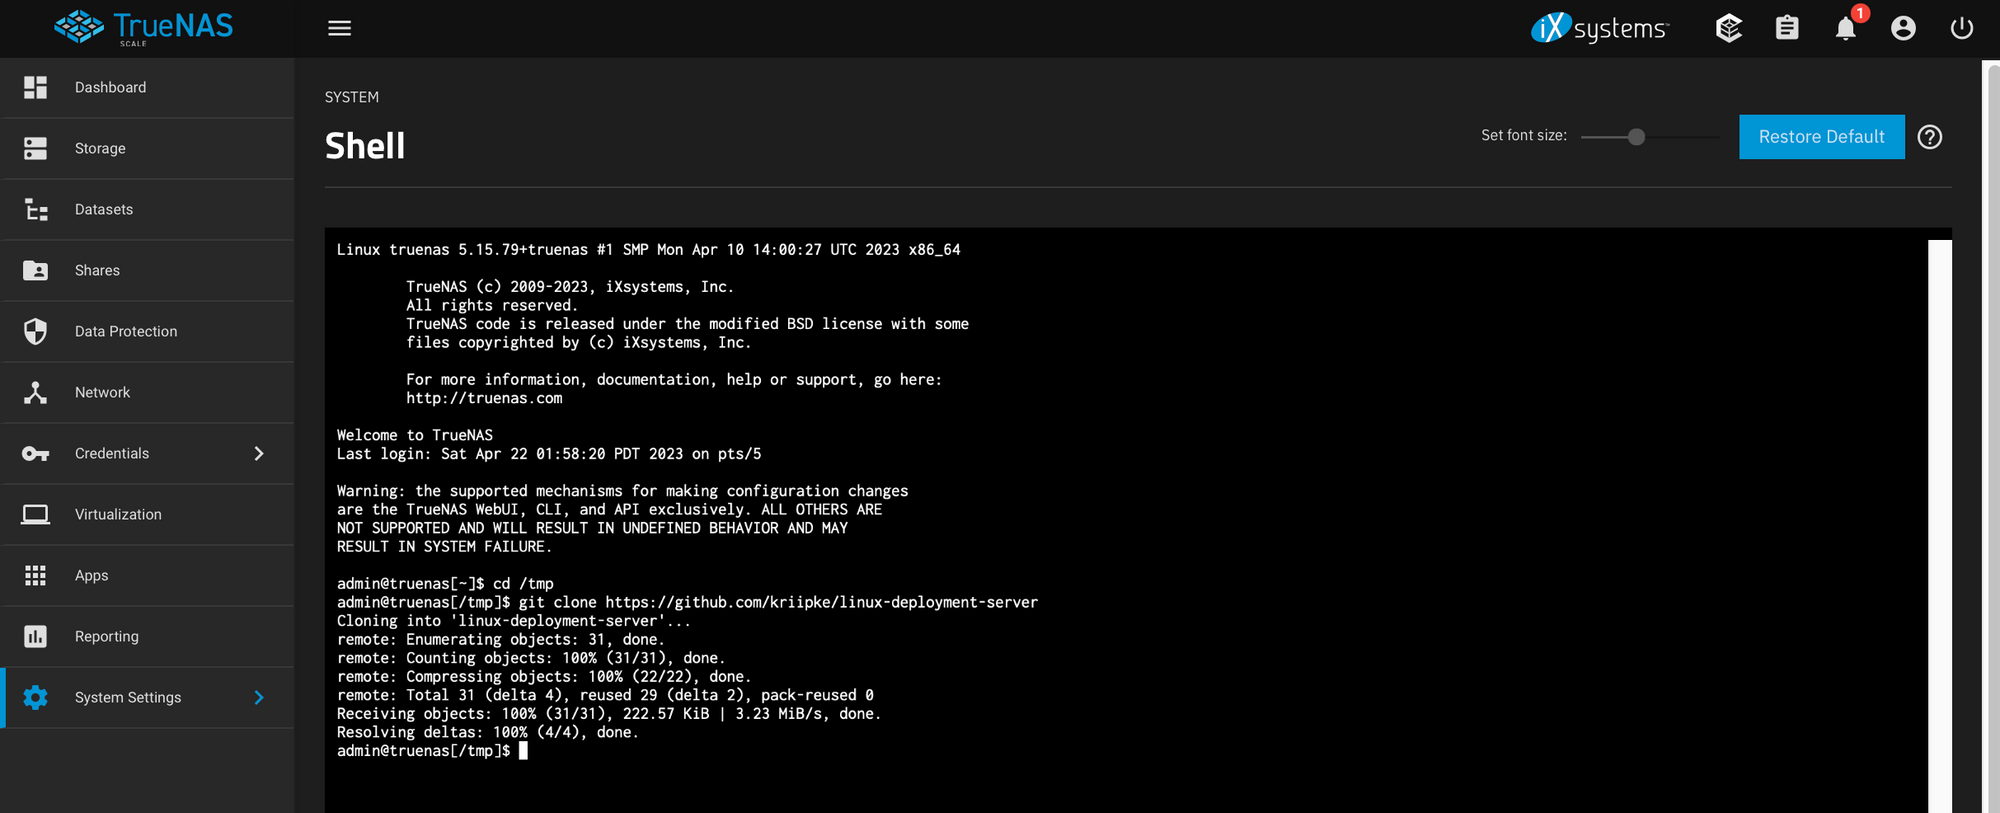
If you open TrueNAS and open the "System Settings" menu on the left-hand navigation you will see an option in the menu for "Shell". Click on that and navigate to /tmp and clone the repository with git clone https://github.com/kriipke/linux-deployment-server.
I would highly recommend reading over the README.adoc to get a good understanding of what's going on here. I would also recommend opening up the Makefile and reading over the shell commands executed at each step to make sure you're not robbed of learning anything.
If you decided to read it over it should be pretty apparent how to use it as it's fairly documented. If you don't want to bother yourself with that, after you clone the repository just copy the contents of the folder /tmp/linux-deployment-server/pxelinux into the root of your TFTP server. This should be able to to be done with a command like:
cp -r /tmp/linux-deployment-server/pxelinux/* \
	/mnt/$YOUR_POOL_NAME/deployment/pxelinux/
On my system, since my pool's name is store, I'd have something like the following
/mnt/store/deployment/pxelinux
/mnt/store/deployment/pxelinux/ldlinux.c32
/mnt/store/deployment/pxelinux/images
/mnt/store/deployment/pxelinux/images/RHEL-9.1
/mnt/store/deployment/pxelinux/images/RHEL-9.1/.gitignore
/mnt/store/deployment/pxelinux/images/RHEL-9.0
/mnt/store/deployment/pxelinux/images/RHEL-9.0/.gitignore
/mnt/store/deployment/pxelinux/pxelinux.cfg
/mnt/store/deployment/pxelinux/pxelinux.cfg/default
/mnt/store/deployment/pxelinux/libutil.c32
/mnt/store/deployment/pxelinux/pxelinux.0
/mnt/store/deployment/pxelinux/menu.c32
/mnt/store/deployment/pxelinux/libcom32.c32
At this point, the only files you're missing are the vmlinuz and the initrd.img for each release. You can find these files on the installation DVD of each release at /images/pxeboot/vmlinuz and /images/pxeboot/initrd.img.
Copying these files over from each release is quite laborious and will get annoying really quickly so, if you choose, you can use the Makefile to make this a lot faster by:
- downloading the DVD installation disk for each release and placing it the
/tmp/linux-deployment-server/isodirectory we created when you cloned the repository from GitHub. - Navigate to
/tmp/linux-deployment-serverand edit the first few lines of theMakefilewith the right variables for the ISO & release you need the boot files from. - Typing
make bootimgsin the same folder as theMakefileand it will place them in the correct directory. Make sure you change theTFTP_ROOT := ./pxelinuxline to the correct path in your TrueNAS store (it should be something like/mnt/$YOUR_STORE_NAME/deployment/pxelinux/images).
Once you do this you should have the full file listing, checking it against this one below:
/mnt/store/deployment/pxelinux
/mnt/store/deployment/pxelinux/ldlinux.c32
/mnt/store/deployment/pxelinux/images
/mnt/store/deployment/pxelinux/images/RHEL-9.1
/mnt/store/deployment/pxelinux/images/RHEL-9.1/vmlinuz
/mnt/store/deployment/pxelinux/images/RHEL-9.1/initrd.img
/mnt/store/deployment/pxelinux/images/RHEL-9.1/.gitignore
/mnt/store/deployment/pxelinux/images/RHEL-9.0
/mnt/store/deployment/pxelinux/images/RHEL-9.0/.gitignore
/mnt/store/deployment/pxelinux/images/RHEL-9.0/initrd.img
/mnt/store/deployment/pxelinux/images/RHEL-9.0/vmlinuz
/mnt/store/deployment/pxelinux/pxelinux.cfg
/mnt/store/deployment/pxelinux/pxelinux.cfg/default
/mnt/store/deployment/pxelinux/libutil.c32
/mnt/store/deployment/pxelinux/pxelinux.0
/mnt/store/deployment/pxelinux/menu.c32
/mnt/store/deployment/pxelinux/libcom32.c32
Deploying Your Kickstart Files
The kickstart files are extremely powerful. You can find a nice reference for the most recent version of Enterprise Linux (of all variations including Rocky, CentOS, etc.) here. For Fedora, the most up-to-date reference is here. To deploy these files copy all the files from /tmp/linux-deployment-server/ftp/ to /mnt/$YOUR_STORE_NAME/ftp/.
lang en_US
keyboard --xlayouts='us'
timezone America/New_York --utc
rootpw --plaintext changeme
user --groups=wheel --name=ansible --password=changeme --uid=1000 --gecos="For making unattended changes with Ansible." --gid=1000
reboot
text

nfs --server=10.2.0.6 --dir=/mnt/store/deployment/mirror/el9/rhel-9.1

bootloader --append="rhgb quiet crashkernel=1G-4G:192M,4G-64G:256M,64G-:512M"
zerombr
clearpart --all --initlabel
autopart
network --bootproto=dhcp
skipx
firstboot --disable
selinux --enforcing
firewall --enabled --ssh

%packages
@^minimal-environment
qemu-guest-agent
openssh-server
-kexec-tools
-dracut-config-rescue
-plymouth*
-iwl*firmware
%end
The above example is the kickstart file I have included for EL9 variants for virtual machines. Really the only thing that makes it special for virtual machines is that it removes a lot of firmware that won't be used and installs the qemu-guest-agent package so that it'll play nicely with KVM hypervisors when booted up as a guest image.
Make sure to change the line with NFS in it your local NFS server IP. This will be the IP of your TrueNAS server. In all fairness, you could just as easily replace this line for one that starts with url which allows you to specify an internet-based repository instead of one hosted locally via NFS. The option is yours. See here for more information.
I could give you a handful of kickstarts but in all honesty, the whole point of the kickstart files is customization. My Kickstart files (or anyone else's) wouldn't do you any good because your needs are unique your kickstart files should reflect that.
It's important to understand that the heart of this deployment workflow is the kickstart files though. Having multiple, special-purpose kickstart files associated with different boot options in your /pxelinux.cfg/default is where the real magic happens.
The options are really limitless. CentOS has a pretty illustrative documentation section on post-install scripts that can be run from the kickstart files:
I won't tell you what your kickstarts should look like but I will give you some ideas to get you going. You could configure any of the following in your kickstarts:
- create a domain joined host
- add your favorite repositories (e.g. Docker, EPEL, etc.)
- create an Ansible user for immediate provisioning
- use a kickstart to deploy identical nodes in a Linux computing cluster
- set a security baseline for all newly deployed hosts on your network
- configure logging and remote monitoring
- deploy an agent such osquery, Chef, Puppet, etc.
Hosting a Local OS Repository via NFS
The idea behind this is simple. You're basically going to mount the installation DVD and copy the entire contents into a folder in /mnt/$YOUR_STORE_NAME/deployment/mirror. In order to help with this task, I've included a target in the Makefile for this.
- Download the installation DVD for the release you want to mirror and place it the
/tmp/linux-deployment-server/isodirectory we created when you cloned the repository from GitHub. - Navigate to
/tmp/linux-deployment-serverand edit the first few lines of theMakefilewith the right variables for the ISO & release you need the boot files from. - Typing
make osrepoin the same folder as theMakefileand it will place them in the correct directory. Make sure you change theREPO_DIR=./mirrorline to the correct path in your TrueNAS store (it should be something like/mnt/$YOUR_STORE_NAME/deployment/pxelinux/images).